This is Kat's Writing.

Following are a series of words and imagery.
Relax.
Enjoy.
Do not be too alarmed at life nor too complacent in the world. There may be alarming things here. There may not be. Have I mentioned scatological yet?

Nightmare

Nightmare
Showing posts with label knitting. Show all posts

Monday, March 21, 2011

Fat Bottom Girls Need Warm Legs Too!!

I have a confession. I don't have thin little willowy legs. I've got German carthorse legs, thick legs, legs to keep going over snowy veldts, legs made for using and really not seeing. And, they are really white. I don't tan you see. But, they are my legs and I loves them.


That doesn't mean I don't wear skirts or dresses and like wearing them. (And in the summer I even do shorts and short skirts! The scandal, comfort over concealment!) But, in the wintertime... my legs get cold. I often wear leggings of some sort or sometimes even the non-stylishly cozy warmth of thermal undies.

But sometimes, a girl wants something a bit jazy, a bit colorful and even a bit cute. AND I had this lovely Noro laying around...and some chunky homespun 'art yarn'. So here goes!

2 skeins Noro Kureyon
Around 80 yards of a chunky thick/thin or heavy homespun yarn.
set of 5 size US 7 DPNs
set of 5 size US 10 DPNs
Tape measure

You may like to divide your homespun into two equal balls before hand.

I knit on size 7 needles for the Noro and size 10 for the chunky yarn. The Noro was at a gauge of  5 stitches to the inch and 7 rows to the inch.

First, you measure yourself. My ankles are around 10 inches. I used 54 stitches to even out the ribbing. Arrange the stitches around four needles so half the stitches are on two needles and half on the other two.
I did 2x2 ribbing for one inch.

Then plain out knit each row till your piece reaches where your calf muscle begins to swell. Increase once after knitting the first two needles then increase once more at the beginning of the next two. (Essentially you increase on either side of the legwarmer.) Knit a row and repeat the increase row again. So, I had 58 stitches. I knit till almost the end of my first skein.

TURN YOUR WORK INSIDE OUT!!!

Join your chunky yarn and begin knitting with the big needles. Knit three rows and decrease twice in the same manner as the increases, on either side of the warmer. Knit a row and repeat the decreases. Knit a last row. Work an eyelet row of (YO, SSK). Knit till you have enough yarn to bind off with plus one yard.. I did two more rows and then bound off using the lace BO of *knit 1, YO, knit a second stitch*. Slip first two stitches over last stitch. Repeat. On the last stitch slip an empty needle into the first bound off stitch and hook the last stitch over that. Turn work right side out. Weave in ends. Take leftover yard of yarn and run through the eyelets and back through front. You can also use elastic as an way to help keep them up.

Repeat for other leg.


I think they are pretty awesome myself. And warm! :)

Friday, February 18, 2011

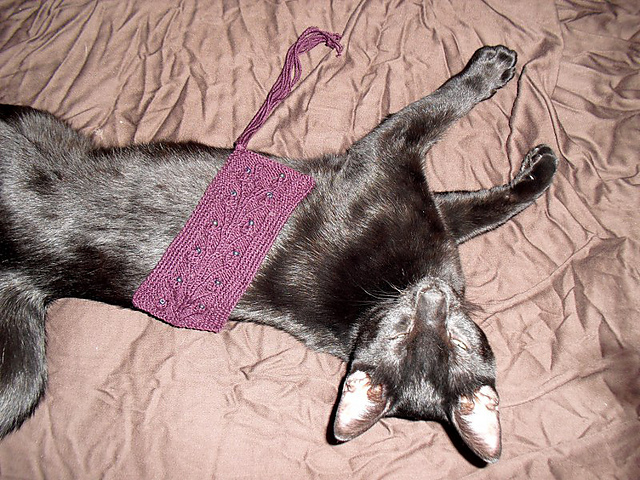
I've got a new pattern. A Nasturtium for your books.

The Zar Kitten approves.


Half the proceeds from sales will go to a breast cancer group. As soon as I can find one that isn't doing crap like suing people over silly crap that is. And it is plenty inexpensive... just a buck fifty!

Nasturtiums are vine growing, prolifically flowering plants that are easy to grow and will reward little effort with masses of white, orange and red flowers. They are also edible and make a nice spicy addition to a summer salad.
I miss the summer you see, I'm tired of looking at dark skies and the dreary greys and browns of the Northeast winter. I want my summer back. I'm ready to flop myself under a shady tree by some lovely flowers and read a good book in the afternoon heat.

I can't have all that warm and outside yet, but I can have my flowers. I hope you like them.

Friday, February 11, 2011

Paintin' the Hooks Red! (With Beads and How-To)

So I'm a bit newish to beading. For the longest time it just didn't make sense. Then, I actually started to mess around with beads and hooks and yarn and bits of dental floss.

And I learned a few things.
First, it isn't that it is intuitive or that beading is hard. It is a bit unintuitive if you are used to using a crochet hook to actually crochet stuff. The dental floss thing makes sense after you do it.
Second. Beading projects tend to get messy. They are not travel friendly. Beads are small tricksy things that like to dive onto floors and scurry into the deepest darkest shadow they can... or at least the nook you have the most trouble getting them out of.
Thirdly, a single sized bead can be used on everything from fingerling to worsted.
Fourth, all steel crochet hooks look alike in the box..

I felt the second and fourth were issues that would impede my enjoyment of sticking bits of shiny glass on yarn. Must fix. 

So , everything I've learned from other places and trial and error and what I will call pure idiot moments is here. Maybe it will be usefully to someone else.

First, the tools of the trade.
Knitting with beads tools.

Don't mind my 5th hand crafting end table. It's a bit rough, but I don't feel bad if I spill paint on it.


The Basics
I use these items to knit with beads and or crochet with beads. You see here creamy beads in an old medicine container (keeps kids out), beads in a bead flat (works pretty good if you are somewhere with a table) and beads on safety pins.
Those pins are great if you want to bead in public or bead in a car or somewhere lacking table. You see a big bead on a pin, some dark shiny beads on a normal pin and a bunch of lighter shiny beads on a safety pin that I unbent. Depending on how handy you are with the pliers you can also bend the sharp tip of the pin into a hook and thus use your traveling bead holder as your beading hook as well. It's one less thing to drag around ya know? Just be careful not to jab yourself bending it...

Now for the things most people use for beading. Crochet hooks and dental floss. See the white thread there? That's floss. The travel size floss is behind the yarn. See the silver sticks with nail polish on them? Those are hooks that I have color coded. They are all about the same size. They range from 1.00 mm (the red one) to 3.5 mm (the black one). I use the tiny one to bead most yarns and the biggest one to grab dropped stitches in worsted projects. It was most annoying to grab the wrong one from my box o' crafting tools (because I can't be bothered to craft up a pretty tool holder.. I'd rather be making fun stuff!) So, I took some handy nail polishes and colored the end of each a different color. I marked the ones I used the most in the brighter/most noticeable colors. Now, it is very easy to grab the right one without having to always check the size. This was born of a pure idiot moment, heh. If you want to get all Martha on them.. you can do that too. I'd rather spend the time making other stuff though.

The yarns are Noro Kureyon and Rowan 4 Ply Soft. I have used these both with the same sized needle and bead. The Noro is a aran/worsted weight and the Rowan is a fingerling. Obviously, the bead was a bit tighter on the worsted yarn!

The Beads

Now, the beads I use are a size 6 bead. Seed beads have bigger inner holes I'm told; you can use a bigger hook with them, a 1.5mm steel hook (US 8, UK 4 1/2), and that combined with bigger hole means they are easier to get on bigger yarn. Regular sz 6 beads work better with a 1 mm hook (US size 12, UK size 6 1/2 and while you can use them with worsted, they slide better on smaller yarns. For most beaded knitting projects these sizes will do ya.
If you want a smaller bead on the smaller yarns or crochet thread (size 10 thread is what I've seen kicked around and it's roughly the same as lace-weight yarn or size 0 in the weight system), a size 8 will be what you need. You will need either a 1.0mm hook or possibly smaller. For thicker yarn, use a pony sized bead. Yes, they come in glass and other non-kiddie plastics. But, they are heavy. Use a regular small crochet hook or a 3.50/3.0mm hook.

How-To With a Hook

Making a sock..
Now for a little how-to lesson. With pictures! Because that indeed makes it simpler.. What you see here is Premier Serenity sock yarn on size 1 needles. It's a fairly fine yarn. It will also be our beading modal.

First you knit the stitch to be beaded but don't pull the new stitch tight. Instead pull it loose on the needle. Stick a bead on your hook.
black size 6 seed bead on 1.00mm hook
Replace the needle with your hook.
Your hook is now the needle.

Now slide the bead over onto the yarn.
The bead is now on the yarn. BEADED!!
 After sliding the bead onto the yarn remove hook, replace the knitting needle in the loop above the bead and pull the stitch tight as the rest.

For Dental Floss
I use this when my bead hole is too small for the hook or when the small hook would shred the yarn. It's not my favorite way to do things but it does work. Start the same way as with the hook method. Knit the stitch. Pull the loop loose and off the needle. Slide one end of the floss through the yarn loop. Pull taunt, but not so hard you are messing up the gauge.
Floss in knitted loop, bead waiting on table.
Stick the ends of the floss together. Feel free to lick the ends to make them stick together if needed. Slide bead onto floss.

And bead is on the floss!
Slide bead down floss and over onto the yarn.
Whee!!! You're beaded!

Now, just slide that loop above the bead back on the needle, tighten that stitch up and keep on trucking.

Now, I have yet to pre-bead yarn. I like sticking mine on as I go. I'm told one of the easiest ways to do this is to use a BigEye needle. They sell them where you get beading supplies. Or, you can use beading wire or dental floss. Instead of flossing onto one stitch, you just keep pulling those beads down the strand. One day I'm going to try this though.

Wednesday, January 12, 2011

Diamond in the Rough.

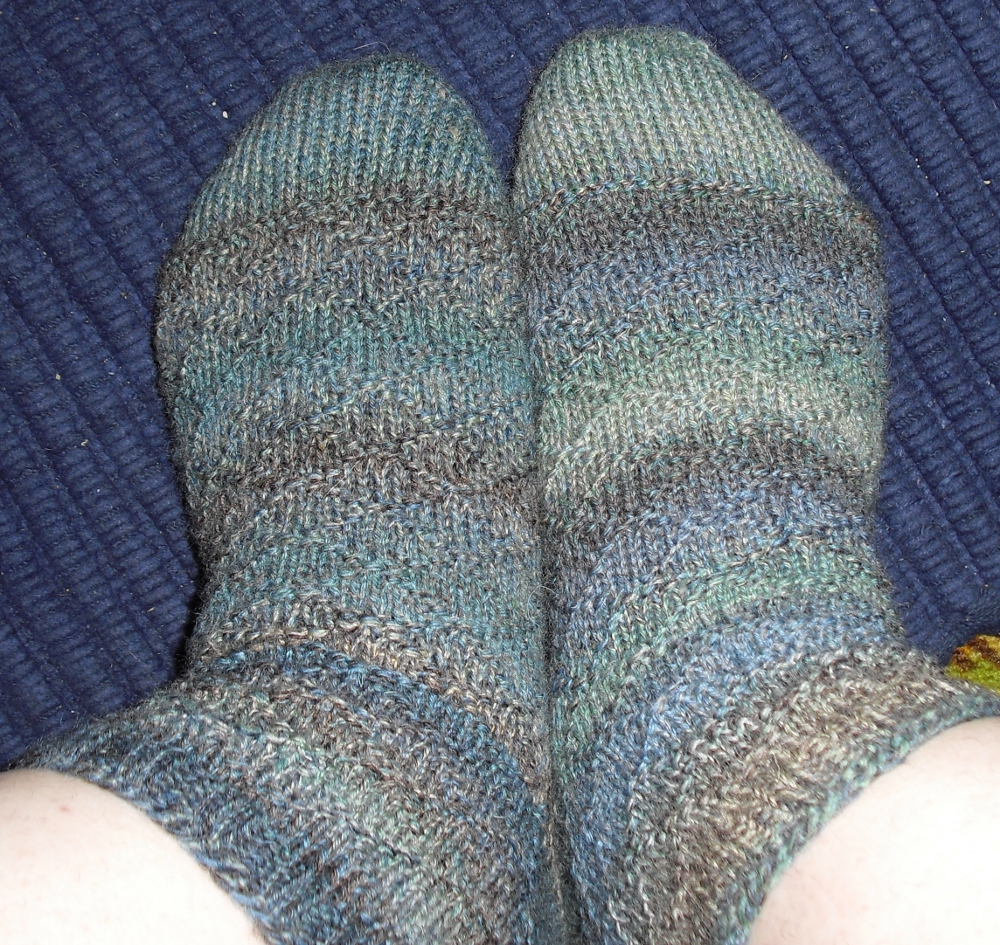
This patten assumes some basic toe up sock construction knowledge. It came to be as I was in a place where working any sort of complex pattern would be impossible... but I would have been bored to bits working a plain sock. I was also using Patons Kroy FX. It is a yarn which has continuous color shifts using changing colors spun together instead of a single spun strand that is simply dyed. I wanted to showcase this feature of the yarn. It was why I had chosen the yarn in the first place! I love this look.


I had bought two skeins of several colors  of this stuff on sale... so I used a single skein per sock. This was enough for a sock, but if you like knee highs or have really big feet to cover you may want a third skein. Also this pattern assumes you know things like Turkish cast on and how to do a short row heel. Don't sweat if you don't...that's what google is for. :) Lastly, if you like this pattern, please consider making a donation to either breast cancer research or an animal shelter. If you are broke, you can always just give a click. If there are any mistakes in this pattern, my apologies. Just let me know via comments. Some sizing is possible. 6 diamonds from the center fits my US woman size 9 foot very well. Another repeat to 7 diamonds fits my US 11 man. Adjust as you need.


THE SOCK

2 skeins of Paton's Kroy FX
One set of 5 US size 2 needles (or circ equivalent)
You need to be able to knit/purl, knit front/back, and turn a short row heel as well as an YO Bind-off

Using a Turkish cast on,  CO 8 sts over 4 needles. Knit one row and place a marker.
Increase to 64 in the following manner:

1. From marker, knit one. Knit front/back, knit to one stitch before end of second needle, knit front/back. Knit last stitch. Knit one stitch on third needle. Knit front/back. Knit to second to last stitch on fourth needle. Knit front/back. Knit last stitch.
2. Knit all to marker.
Once you have increased to 64 sts total you begin the sock pattern.

Purl across the instep, knit across the sole. Begin diamond pattern on instep.

1. p1, k7. Repeat across instep. (To even out the pattern slip first stitch of third needle onto second needle to be purled.)
2. k1, p1, k5, p1 Repeat

3. k2, p1, k3, p1, k1 Repeat
4. k3, p1, k1, p1, k2 Repeat
5. k4, p1, k3 Repeat

(All rows on sole are plain knit.)

Continue till long enough,being sure to end on row 1 of pattern.

Do short row heel. It will be divided as 11 sts wrapped, 10 center sts and 11 sts wrapped. Begin pattern (if desired) on back of leg on final knitted row.
Work at least 4 repeats of diamond pattern on leg. When finished, knit two rows before beginning k2, p2 ribbing. Work ribbing for 6 rows (or more if yarn and desire to rib are sufficient) before binding off in the YO stretchy bindoff. Enjoy your subtle but super socks.

Working Away Here

The last couple of weks here have been rather difficult. But, I have had a few small pleasures. One of those pleasures was (and is) this super simple sock pattern that I will be sharing as soon as I get a few pictures. There is another pattern I will be dedicating to my mother. See, I worked it the night I watched over her. She liked owls....and there are four of us. Both of these will be up here soon. I just need a bit of time.

 ...and a few other patterns that I'll be hoarding for a bit longer.

Wednesday, April 14, 2010

CABLE WORK!!!!


(this was part of a prior post but I edited to expand here)

Cables. Cables are fun, cables are dandy... if you get one wrong you're in for a treat. This is a test project panel over 80 stitches wide, no repeats and no surrender. See, I've done cables before. I love the way they look on flatwork. I love them on socks. I love them on pillows and hats.

I thought to myself.. 'Kat, you love cables, you even designed a very simple X and O cabled glove (free on rav)... this lady makes awesome and awe inspiring cabled projects and well.. she needs test knitters....'

Sweet.

I didn't realize just how big it was. Nor did I realize that this is a non repeating pattern. And my first try was on dark green yarn. I've ripped it out and restarted more times then I care to count.


But.. I have grown as a knitter and have learned a new technique. Crocheting the mistake. You need a screwed up cable (6 or more rows down seemed to be when I noticed the problems) a number of DPNs/extra cable needles and a few small crochet hooks. (Mine were a D and an F and I was knitting with US 10 needles and worsted weight Red Heart yarn) You want to be able to have plenty of loose yarn around said hook. Oh, and a good picture or great chart of whatever you are doing is helpful!

Anyways all you do is slide the stitches to be reworked off the knitting needles. Secure the points (I stuck point protectors on mine) so no other stitches would slide off. You can unraval with the little hook pairs of stitches down to the issue and fix them pair by pair (or trio by trio) like I did with the smaller fixes.. or just yank down the entire section (as in the picture) and rework the entire piece till it looks correct. This was a 6 stitch rip down through 10 rows. I'd 4 needles holding pairs of stitches here and there as I retwisted and reworked them.
I'd miss-crossed on the first cross which was ruining the look..and forgotten to cross two others. Took almost two hours... but compared to the ten-fifteen hours it would have taken to restart the work.. Yup.

Some others reknit the ripped section. I think hooking up as for a dropped stitch is faster. YMMV.

Things I have learned about complex cabling.
(thanks to a fellow Ravelry member faeriesandpixies and others)

1. Color the different cable stitches in both your legend and the chart. Color one cable cross at a time, for the entire chart (say, starting with c2 over 2left). You will then see how that cross moves through your chart. This will be the visual representation of your pattern and will be really helpful as you knit

2. Study the differences in the cable stitches. You don’t need to memorize them, just understand them. (Hint: basically there are only two kind of cables, left- and right-leaning, or left- and right-crossing. After that, the differences are in how many stitches are crossed, what kind of stitch is crossed, and what kind of stitch is in the background. Usually the knits are crossed and the purls are in the background. And they are in this pattern.)

3. Try to use a light-colored wool or wool/blend yarn.

4. Mark off each row that you have completed. Everyone occasionally forgets what row they are on. Try to do each RS(odd #s) and it’s following WS(even #s) row in one sitting. Then look at your work to make sure it’s correct. Stopping and starting mid-row tends to make for mistakes. Knitting cables is alot about attention span and concentration (both I struggle with from time to time :).

5. Cover the rows above the working row.

6. Set yourself some goals. Do two rows, have a soda, then eight more, have a tea, then ten more.


Yeah... I'm glad I'm doing this. I'm just that much closer to writing another pattern of my own...with cables. Now I should stop procrastinating on this here blog and go finish the thing.

Tuesday, April 13, 2010

My Big Gay Socks, A Travelling Woman and Ireland Forever

My Kali approves of my Big Gay Socks. Maybe. I have a theory about this. First, she is a chihuahua. Chis and gay men do indeed travel together very often. Secondly, she was brought home by one Big Gay brother (yeah, he's my baby brother but he's still well over 6 foot..and he is very very gay; like Big Gay Al gay) and in his room he had the rainbow well covered. In this rainbow-laden delight she spent her first few weeks of formative time. Third, this brightly colored thing is taking my attention from its rightful recipient...namely, her.

This dog and these socks do indeed amuse me. She normally just tries to sit on my knitting much like a cat would. These socks get little 'riff-riff's barked at them. The socks themselves are a resized Spring Forward for my size 10 US feet. Namely, I am doing them toe-up on US2s with a reworked lace stitch.
Now my Travelling Woman shawl... it's soft and warm and of course I made it just for her to rest upon or under. I cannot throw this thing on without her trying to borrow underneath it.

I mostly took this shot to show the crocheted edge I threw on the thing to stop the edge rolling up. Yes, it's worsted, yes it is killed acrylic yarn.. but no I'm not going to sit for any damned rolling. I do love this thing for late night snuggling/book reading/knitting when a blanket would be too much or get in the way.


I'm happy I made it. I'll probably make more shawls soon...


...And here is one! This is a
Multnomah with a few mods. I started it on St. Patrick's Day hence the name.


Almost finished with the plain bit. Garter gets so dull after a while. This will probably be redyed darker green or blue...the neon is too much for this white girl.
This one will probably get to leave the house when finished.


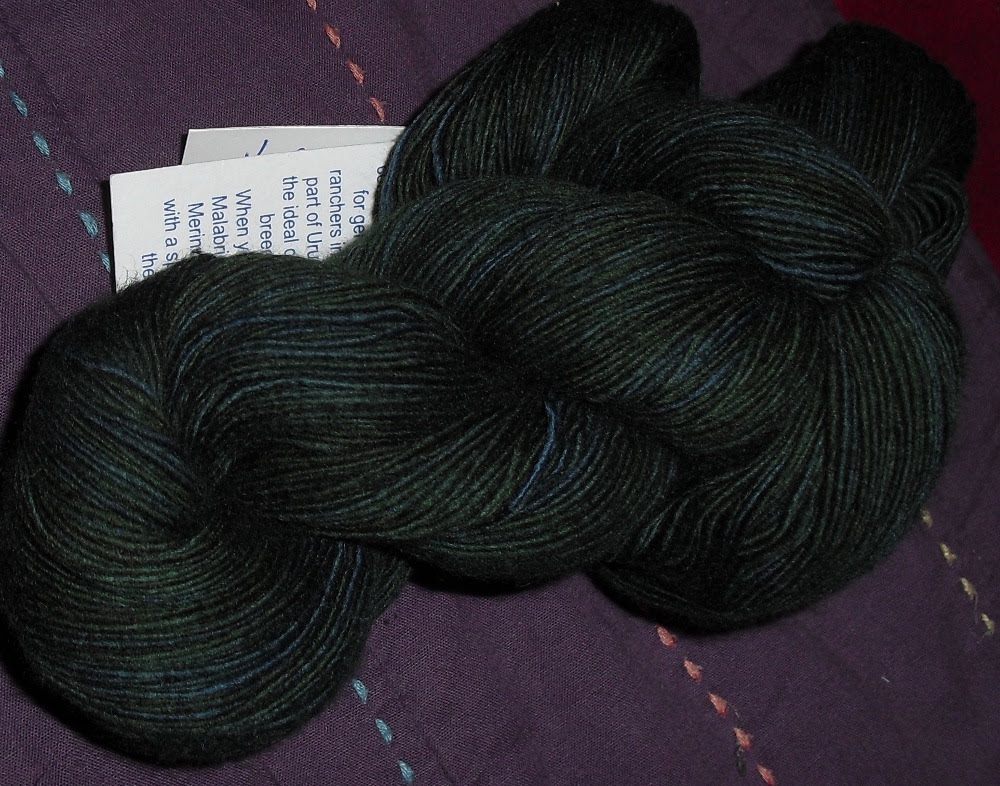
This is a skein of Malbingo lace in colorway VAA.
No idea just what that is short for...just that this is probably the softest thing I have ever personally touched. The colors are dark green, dark brown and deepest green-blue. It looks of summer.

Friday, April 9, 2010

Estonian Lace Cliffs Notes

http://www.knittingbeyondthehebrides.org/lace/estonian.html A how-to guide

http://www.twosheep.com/blog/?p=538 deconstructing lace

http://www.marniemaclean.com/words/2006/01/shine_your_ligh_1.html star stitch
With a multiple of 4+1
Star: P3 tog, but leave old stitch on left needle, yo, P same 3 stitches together, removing the old stitch from the left needle.
Rows 1 and 3: Knit
Row 2: *k1, star stitch* repeat to last stitch, k1
Row 4: k1, p1, *k1, star stitch* repeat to last 3 stitches, k1, p1, k1

http://estonianlacestudy.blogspot.com/ collection of videos and guides

Lace

http://www.eunnyjang.com/knit/2006/03/majoring_in_lace_introduction_1.html Lace 101

http://www.jessica-tromp.nl/index.html a motherlode

http://www.heirloom-knitting.co.uk/beginners_guide.html GUIDE TO CHARTS!!!!!!

http://tiajudy.com/lace.htm

And thus concludes my tiny gathering of usefull linkage.

Tuesday, March 9, 2010

My First Malabrigo


It's kinda like one's first lay. Apparently it is just that important.

Anyways, here she is.

She's gonna be a 198 yards of heaven.


Funny enough a traded for hank came at the same time. This one's lace weight though.

I'm thinking Sommerwind?