..is cooking me. First it was over 90 for a week straight outside.. my apartment averaged 96 to 98. Now, the humidity is hovering around 100%. I'm guessing the earth has decided that simply baking us to death is not good enough. We must be steamed to release the proper flavour.
Anyways, I have barely been able to stand touching any crafty thing almost all month. No drawing, no painting, very little sewing and almost no knitting or crocheting. I'll start and then the heat just wears me out or the idea of touching heat trapping yarn or cloth or smudgy messy things that will then require me to clean atop of making the artz.. just no. Dog and I have spent so much time outside swimming and hiking slowly around that this whitest of white girls has a tan. In my search to keep my cats from cooking in their fur they have grown used to cool water dunks. Funny how weird things like that can happen.
So, enjoy this lovely sunset. Two angles, same sunset, 15 minutes apart.
This is Kat's Writing.
Relax.
Enjoy.
Do not be too alarmed at life nor too complacent in the world. There may be alarming things here. There may not be. Have I mentioned scatological yet?
Nightmare
Sunday, July 31, 2011
Wednesday, June 29, 2011
I Made Hair-Toys! And did girly things with hair..
Those few of you who may read this who know me in RL will be surprised at this. I've got hair most of the way down my back these days. I don't plan on cutting it any time soon either. All this really means is I need fun ways to keep it off my neck in this heat that aren't ponytails. I've been braiding my hair a lot...and playing with buns.
I have very thick hair. While not 100% accurate, my ponytail is nearing 6 inches (this is not accurate to the nnth degree because I used string to measure this) in circumference. It is also curly and on the finer end of textures. All of these things mean it is a bitch to do anything with. It's thick, so lots of hairstyles need it to be longer to look right. Curly means brushes just rip it out. It not being coarser means it will slip out of do's faster.
But, I can do hairstick stuffs.
| Freshly Created Hair Sticks!! |
Tuesday, June 28, 2011
My Applogees, People.
I did not realize I had so many damned ads on this thing. I *thought* I had one small one on the side and one way at the bottom buried below everything. Both are supposed to be text only and blended in to not be obnoxious. I turned off a few security things for a minute and all of a sudden I had all of these new little boxes popping up on the blog control panel. Opened a preview and... yeah. I'm sorry.
I fixed it. I was adding a pattern link box and updating other stuff to make this thing better.. and those ads were just too much. I did add a music widget from Amazon but my quick check tells me it won't start blaring at you all of a sudden. And, I like music. I like clicking on music widgets. That one can stay.
Awesome Thing found in a Thift Store! And SPARKLIES!
I'm not sure what exactly it is but it is indeed awesome. It is a Thing from the Thrift Store!
This is what happened.
After the Great Burn of Last Month, I am really keen on not getting crispy again. I now have fresh new unholy strength sunblock (safe even from Hell's flames!), an actual tan..I'm really not sure how that happened.... and a desire to somehow protect my head skin and hair too. Did some reading. Turns out that one of the best things one can use to protect both your hair and your scalp from a burn is dark smooth silk. So, I need at least one silk scarf. But, Jesus on a pogo stick, those things are so not cheap. I mean, 40 dollars for a chunk of fabric with hems on? Argh! No thanks.
So on to the thrift store I go.. in search of silk shirts.. After a search I find what I seek. Two silk shirts of silky silk. Mmmmmmm. One is blue and one is a faded jade green. I will dye them with pretty dyes in tye dye or batik and fashion as I need. Haven't decided yet the final shape. But those are not what this post is about. They are only what drove me to the thrift store. I may post them later after I've sniped and dyed and made them into scarves.
This is what it is about!
I really wish I knew what it was supposed to be used for. Or, if it is like the blue and white Willow Pattern plates with meaning and stories behind it. Or maybe it's just a simple design. It is a lovely Indian lady in a Gagra choli or shalwar kameez (my google fu is unclear here) with a 3 leaved pot atop her head walking through a field. The pot is steaming or on fire..or??
On a side note, googling her dress gave me serious outfit envy. I really need to stitch up a white fat girl friendly version of one of these. First, must finish what I have already started.That is, I must finish my skirt retcon (adding batik fabric to a black mini) and finishing the top I have all charted out from craftster (the backless black one, but done reversible in black paisley and blue pseudo-batik and with a bit more coverage/ties instead of single fit) and do a bit of drawing.
Any way it is, it will look lovely on the brickwork wall in my apartment. I will probably shine it up a bit with brasso first.
And... I must share these!
Nail polish this summer is just full of the sparkles. Last week I picked up a deep sparkly green and a gold glitter. I like them together, with the green nice and dark and the golden glitter lightly brushed over the tips. It's very summer goddess. On a whim I went by the polishes on my way to craft supplies and had to get these:
That is a chrome, five colors of sparkle in one polish, purple glitter and silver glitter. The shiny, I'm blinded by the shiny and the sparklie. I need more hands so that I can wear all these faster.
Now, time to do my nails!
This is what happened.
After the Great Burn of Last Month, I am really keen on not getting crispy again. I now have fresh new unholy strength sunblock (safe even from Hell's flames!), an actual tan..I'm really not sure how that happened.... and a desire to somehow protect my head skin and hair too. Did some reading. Turns out that one of the best things one can use to protect both your hair and your scalp from a burn is dark smooth silk. So, I need at least one silk scarf. But, Jesus on a pogo stick, those things are so not cheap. I mean, 40 dollars for a chunk of fabric with hems on? Argh! No thanks.
So on to the thrift store I go.. in search of silk shirts.. After a search I find what I seek. Two silk shirts of silky silk. Mmmmmmm. One is blue and one is a faded jade green. I will dye them with pretty dyes in tye dye or batik and fashion as I need. Haven't decided yet the final shape. But those are not what this post is about. They are only what drove me to the thrift store. I may post them later after I've sniped and dyed and made them into scarves.
This is what it is about!
| Awesome thing is AWESOME! |
I really wish I knew what it was supposed to be used for. Or, if it is like the blue and white Willow Pattern plates with meaning and stories behind it. Or maybe it's just a simple design. It is a lovely Indian lady in a Gagra choli or shalwar kameez (my google fu is unclear here) with a 3 leaved pot atop her head walking through a field. The pot is steaming or on fire..or??
On a side note, googling her dress gave me serious outfit envy. I really need to stitch up a white fat girl friendly version of one of these. First, must finish what I have already started.That is, I must finish my skirt retcon (adding batik fabric to a black mini) and finishing the top I have all charted out from craftster (the backless black one, but done reversible in black paisley and blue pseudo-batik and with a bit more coverage/ties instead of single fit) and do a bit of drawing.
Any way it is, it will look lovely on the brickwork wall in my apartment. I will probably shine it up a bit with brasso first.
And... I must share these!
Nail polish this summer is just full of the sparkles. Last week I picked up a deep sparkly green and a gold glitter. I like them together, with the green nice and dark and the golden glitter lightly brushed over the tips. It's very summer goddess. On a whim I went by the polishes on my way to craft supplies and had to get these:
| Shiny. Oh, so very shiny. |
Now, time to do my nails!
Tuesday, June 21, 2011
Random Foodie Post: Seared Tomatoes!!!
I made something awesome today for dinner. I, like many veggie aficionados,often buy a few too many veggies that can be consumed willingly in say, the week before they rot. This time it was tomatoes. The store had a sale on vine ripe red tomatoes... and even though they are no where as good as farmer's market 'matoes I bought two pounds of them thinking something vague about giant tossed salads and Greek Pizza/ white pizza (For those who DON'T KNOW -sad for you!- a Greek pizza uses a white sauce or olive oil with herbs and feta cheese with sliced tomatoes... and white pizza is just Greek pizza without the feta. Yummy!).
And today, I opened the fridge to figure out what to make for dinner I saw the last of these poor things. Still OK but with that slight skin dimple of impending doom. I had to use them but I was fresh out of dough, and another salad would turn me into a bunny.
Now, all praises to the mighty internet gods because it came to my rescue. And that of my poor wilty tomatoes.
Meet Skillet Seared Tomatoes. Ah.. the answer to my prayers.
But I did not have all the things. Some of these things are a bit outside the family's shopping comfort level because they go bad before we can use them. So, I subbed. And, our salt has the iodine in. Everything else was the same.. their directions were followed to a T.
So..these are thier ingredients:
We had them with barbecued beef sandwiches. Very fresh and tasty. Were I to make them again I'd add more garlic (it cooked up a bit too sweet in the oil)... and a bit more sugar since these were not heirloom style tomatoes. The sharpness of the cheddar played very nicely with the sweet garlic and zing of the tomato though. I'd also probably leave them on high heat a bit longer to brown them a bit more.
And today, I opened the fridge to figure out what to make for dinner I saw the last of these poor things. Still OK but with that slight skin dimple of impending doom. I had to use them but I was fresh out of dough, and another salad would turn me into a bunny.
Now, all praises to the mighty internet gods because it came to my rescue. And that of my poor wilty tomatoes.
Meet Skillet Seared Tomatoes. Ah.. the answer to my prayers.
But I did not have all the things. Some of these things are a bit outside the family's shopping comfort level because they go bad before we can use them. So, I subbed. And, our salt has the iodine in. Everything else was the same.. their directions were followed to a T.
So..these are thier ingredients:
- 2 tablespoons extra-virgin olive oil
- 4 large ripe plum tomatoes, halved lengthwise
- 2 tablespoons finely chopped flat-leaf parsley
- 1 medium clove garlic
- 1/2 teaspoon sugar
- 1/2 teaspoon kosher salt
- Freshly ground pepper, to taste
- 3/4 cup shredded Gruyere, Comte, fontina or mozzarella cheese
- 2 tablespoons finely chopped flat-leaf parsley
- 1 medium clove garlic, minced
- 1/2 teaspoon sugar, (optional)
- 1/2 teaspoon kosher salt
- 2 tablespoons extra-virgin olive oil
- 4 large ripe tomatoes, halved lengthwise
- teaspoonish of oregano
- 2 teaspoons of garlic and parsley seasoning (it is dried garlic and parsley, NO SALT!!)
- 1/2 teaspoon sugar
- 1/2 teaspoon salt
- regular pepper, to taste.
- 3/4 cup shredded sharp cheddar
| Pan seared tomatoes. So tasty!! |
Tag!
dinner,
heathy meal,
pan fry,
pan sear,
tomato,
vegetarian option,
waste not,
yummy food
Monday, June 13, 2011
My Nook Gets a Case!
I has an awesome BF!
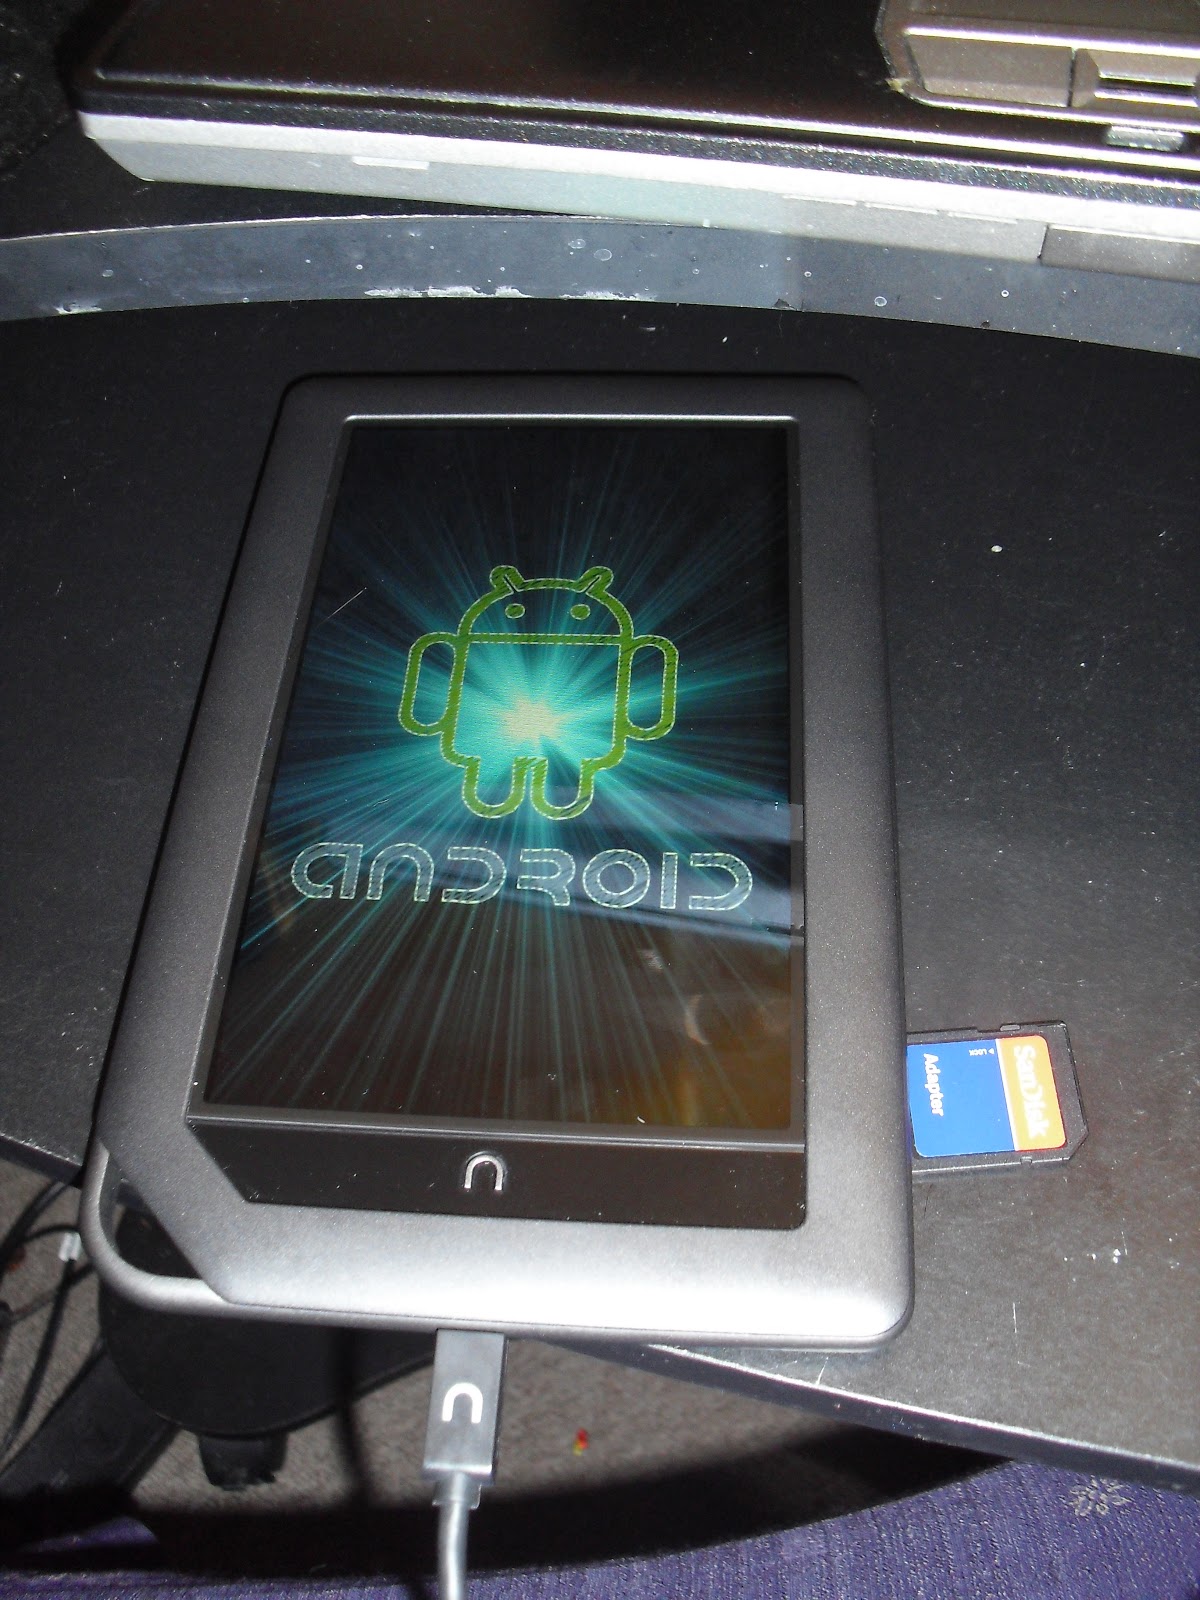
He got me a Nook for my birthday. I hacked it into a tablet... then made it a little Nook Sack.
(And then started to write this post.. got horribly distracted.. and then felt guilty. And, then put it off because I felt guilty.And put it off some more. But... it was eating at my soul, this post. It was so close to being finished, so close to being done. All I had to do was go back and edit a bit.. and then hit Publish.
Argh. I just couldn't deal with the nagging feeling of guilt that comes from a completed post unpublished. So here you have it, a crocheted NookSack, the really easy easy way. And, since this item has been in my rather hard-wearing use since early May I can now say that the thing holds up great. It hasn't warped out of shape, the thick stitches really pad the piece and my Nook looks great. I do plan for a hard case if we ever did any serious traveling.. but this crocheted thing is great for pursing the Nook. Also, as my man so delicately put it, "It looks like a little girls purse that her mommy made for her so no one will be tempted to steal it." Ain't he sweet.)
The Crocheted NookSack.
I used crochet to make a squishy thicker fabric...and because it's faster for me. All it is is a worked in the round single piece with a fastened down (at each end) flap in purple as a lid.
Supplies:
5.00 mm hook
4.25 mm hook
yarn needle
1 skein Pisgah Yarn & Dyeing Co., Inc Peaches & Creme Ombres. I used winterberry.
At least 40 yards of a pleasantly complementary color. I used purple.
This thing is SUPER EASY! All sts are American half double crochet.
First, using the 5mm hook, chain 27. (Note: This will make a fairly snug pocket. As it is cotton it will stretch as you use it.) Chain two and turn and work back to end of chain. Now you will work the same chain sts to create a pocket. First, work a second half double st into the last chain st. Then, work a third half double into that same st. You will have three total in that last st.
Now work back along that chain, putting a half double in each chain again. (This is why we used a bigger needle for the base chain... it needed to be a bit loose!) It will look like this:
Work another half double st into the end chain st (again) to have three total.. again. Now, work a single chain and begin the next round, spiraling up the piece of work. I worked around 15 rows till Nook top is reached. Chain once and attach to row after nook top is reached.
Work back and forth along slightly higher pocket side in second color. I did 6 rows. Using yarn needle very carefully stitch each flap edge to the pocket's edge.
I was going to stitch an Irish rose and leaves onto the front of the cover... but then I started to worry about the extra fabric pressing into the screen when it was in my bag. So no rose.I already had the rose made so no I'm working on giving it a new home.
And there you have it. World's easiest crocheted NookSack.
He got me a Nook for my birthday. I hacked it into a tablet... then made it a little Nook Sack.
(And then started to write this post.. got horribly distracted.. and then felt guilty. And, then put it off because I felt guilty.And put it off some more. But... it was eating at my soul, this post. It was so close to being finished, so close to being done. All I had to do was go back and edit a bit.. and then hit Publish.
Argh. I just couldn't deal with the nagging feeling of guilt that comes from a completed post unpublished. So here you have it, a crocheted NookSack, the really easy easy way. And, since this item has been in my rather hard-wearing use since early May I can now say that the thing holds up great. It hasn't warped out of shape, the thick stitches really pad the piece and my Nook looks great. I do plan for a hard case if we ever did any serious traveling.. but this crocheted thing is great for pursing the Nook. Also, as my man so delicately put it, "It looks like a little girls purse that her mommy made for her so no one will be tempted to steal it." Ain't he sweet.)
The Crocheted NookSack.
| My haxxor skills. FEAR THEM! All kidding aside, this was easy as installing a program on a Windows device. (Now I have CM7 on it but whatever.) |
| The way the colors lined up pleased me. |
5.00 mm hook
4.25 mm hook
yarn needle
1 skein Pisgah Yarn & Dyeing Co., Inc Peaches & Creme Ombres. I used winterberry.
At least 40 yards of a pleasantly complementary color. I used purple.
This thing is SUPER EASY! All sts are American half double crochet.
First, using the 5mm hook, chain 27. (Note: This will make a fairly snug pocket. As it is cotton it will stretch as you use it.) Chain two and turn and work back to end of chain. Now you will work the same chain sts to create a pocket. First, work a second half double st into the last chain st. Then, work a third half double into that same st. You will have three total in that last st.
Now work back along that chain, putting a half double in each chain again. (This is why we used a bigger needle for the base chain... it needed to be a bit loose!) It will look like this:
| ..kinda like a little boat.. |
Work back and forth along slightly higher pocket side in second color. I did 6 rows. Using yarn needle very carefully stitch each flap edge to the pocket's edge.
I was going to stitch an Irish rose and leaves onto the front of the cover... but then I started to worry about the extra fabric pressing into the screen when it was in my bag. So no rose.I already had the rose made so no I'm working on giving it a new home.
And there you have it. World's easiest crocheted NookSack.
Tag!
crochet,
ereader,
free crochet,
free pattern,
Irish Rose,
nook,
nook protector
Thursday, June 2, 2011
I Went Hiking! A Pictorial Post.
Monday, April 4, 2011
The Ipod Excuse
Background..
I'm a plump sort and I'm pretty ok with that. But, I don't like to be unhealthy... even so. And after watching my mother unable to move from her weakness due to her illness and compounded with being very out of shape..and heavy.. I do want to get back into shape. I do, I really do. It was cancer that killed her. I do believe that her lack of physical strength sapped her will. And, I do believe this helped speed the end for her. I hated having to see someone I really loved go through that utter weakness and do not want my loved ones seeing that happen to me if I can help it. Thanks to freecycle I've got a comfy reclining bike that works really well.. even if I cannot adjust the tension on the roller after my three (now four! Old Kid!) nephew made it go *pinkpink* the first time he over-wound it... and a few light weights and stretch bands. And I have been using them pretty regular since I got them too.
For some time I've put off the serious walking/jogging for three reasons beyond my lack of a good sports-bra and shoes.
One. It's still cold out.
Two. I don't have a case that will keep the rat-cage Ipod from wacking around and yanking the earbuds out of my ears.. because I went with earbuds instead of headphones for once. (Still not sure I like them. But.. they are purple..!.)
Three. All my good upbeat techno type music is on a machine I can't start up since it needs a part.
I walk my dog almost every day, just around the block or three as long as it isn't too cold. That's about 20 or so minutes. And I like to hop on the bike for a half hour at least three times a week. But, it is hard. It gets dull. I very often listen to audio books when walking and I've tried to do the same with faster workouts.
But it doesn't work. I loose momentum unless I pay a bit of attention there. I start cycling at the rhythm of the spoken word and that is far slower then I'd like. But then I found this (with the help of rav peoples and google). PodRunner. And it is free! (I did have to tweak my highly restrictive web security settings but Avast didn't make a meep about it afterward.)
If you have iTunes, there is even a free version of 'couch to 5k' from these guys you can get. I haven't tried it yet...but I'm hopeful! Check reason number Three!
So, my number One... it will be in the 50s/60s this week!
My number Two. I fixed that.
| This is the back of the piece. |
About 40 yards of one color WW yarn and about 20 of a second.
Set of 5 sized 5 US DPNs (or whatever you like for working in the round).
Crochet hook about 4.5 mm in size (smaller then a sz 5 needle)
2 pretty beads. (optional)
This is a great pattern to learn two handed stranding. Check out this KnitPicks video to see what I mean.
Note: I have the older model of Nano. It's the longer and thin type instead of those little squares. So, this should fit 5th, 4th, 2nd and 1st gen models. I checked with my 1st and 4th and it fits just fine.
I have this simple little chart to illustrate the decorative stuffs. It's a quick and dirty little pattern for a REALLY easy little sack.
So, cast on 24 stitches with your main color. Join without twisting..
Work two rows.
Work Part 1 of the chart. You may have to skip the last YO/k2tog pair to give your sack the proper number of holes to run the cord through. Just don't sweat it if this happens. It looks fine when done.
Work 5 rows in Main Color. Work Part 2 of the chart.. the first colorwork here!
Work 7 more rows and then work Part 3 of the chart. Repeat it two more times total for a total of three chart repeats.
Work 5 more rows.
You can then kitchener stitch it closed. But I HATE kitchener so I do this instead. Turn the piece inside out and arrange the stitches on two needle equally in such a way you have a front and back. Use a crochet hook to crochet bind-off through both loops at once as if they were a single loop. Turn work right side out and the bottom looks kitchenered.
Use a 4 stitch icord to make the cord. Just stick it though the fabric in the back and fasten it securely. Don't break the yarn to do so! A crochet chain with beads on the end make a nice pull cord.
Now go do something. I'm gonna.*
| (Please excuse dopey picture of me. I'm not a fashionista!) |
Monday, March 21, 2011
Fat Bottom Girls Need Warm Legs Too!!
I have a confession. I don't have thin little willowy legs. I've got German carthorse legs, thick legs, legs to keep going over snowy veldts, legs made for using and really not seeing. And, they are really white. I don't tan you see. But, they are my legs and I loves them.
That doesn't mean I don't wear skirts or dresses and like wearing them. (And in the summer I even do shorts and short skirts! The scandal, comfort over concealment!) But, in the wintertime... my legs get cold. I often wear leggings of some sort or sometimes even the non-stylishly cozy warmth of thermal undies.
But sometimes, a girl wants something a bit jazy, a bit colorful and even a bit cute. AND I had this lovely Noro laying around...and some chunky homespun 'art yarn'. So here goes!
2 skeins Noro Kureyon
Around 80 yards of a chunky thick/thin or heavy homespun yarn.
set of 5 size US 7 DPNs
set of 5 size US 10 DPNs
Tape measure
You may like to divide your homespun into two equal balls before hand.
I knit on size 7 needles for the Noro and size 10 for the chunky yarn. The Noro was at a gauge of 5 stitches to the inch and 7 rows to the inch.
First, you measure yourself. My ankles are around 10 inches. I used 54 stitches to even out the ribbing. Arrange the stitches around four needles so half the stitches are on two needles and half on the other two.
I did 2x2 ribbing for one inch.
Then plain out knit each row till your piece reaches where your calf muscle begins to swell. Increase once after knitting the first two needles then increase once more at the beginning of the next two. (Essentially you increase on either side of the legwarmer.) Knit a row and repeat the increase row again. So, I had 58 stitches. I knit till almost the end of my first skein.
TURN YOUR WORK INSIDE OUT!!!
Join your chunky yarn and begin knitting with the big needles. Knit three rows and decrease twice in the same manner as the increases, on either side of the warmer. Knit a row and repeat the decreases. Knit a last row. Work an eyelet row of (YO, SSK). Knit till you have enough yarn to bind off with plus one yard.. I did two more rows and then bound off using the lace BO of *knit 1, YO, knit a second stitch*. Slip first two stitches over last stitch. Repeat. On the last stitch slip an empty needle into the first bound off stitch and hook the last stitch over that. Turn work right side out. Weave in ends. Take leftover yard of yarn and run through the eyelets and back through front. You can also use elastic as an way to help keep them up.
Repeat for other leg.
I think they are pretty awesome myself. And warm! :)
That doesn't mean I don't wear skirts or dresses and like wearing them. (And in the summer I even do shorts and short skirts! The scandal, comfort over concealment!) But, in the wintertime... my legs get cold. I often wear leggings of some sort or sometimes even the non-stylishly cozy warmth of thermal undies.
But sometimes, a girl wants something a bit jazy, a bit colorful and even a bit cute. AND I had this lovely Noro laying around...and some chunky homespun 'art yarn'. So here goes!
2 skeins Noro Kureyon
Around 80 yards of a chunky thick/thin or heavy homespun yarn.
set of 5 size US 7 DPNs
set of 5 size US 10 DPNs
Tape measure
You may like to divide your homespun into two equal balls before hand.
I knit on size 7 needles for the Noro and size 10 for the chunky yarn. The Noro was at a gauge of 5 stitches to the inch and 7 rows to the inch.
First, you measure yourself. My ankles are around 10 inches. I used 54 stitches to even out the ribbing. Arrange the stitches around four needles so half the stitches are on two needles and half on the other two.
I did 2x2 ribbing for one inch.
Then plain out knit each row till your piece reaches where your calf muscle begins to swell. Increase once after knitting the first two needles then increase once more at the beginning of the next two. (Essentially you increase on either side of the legwarmer.) Knit a row and repeat the increase row again. So, I had 58 stitches. I knit till almost the end of my first skein.
TURN YOUR WORK INSIDE OUT!!!
Join your chunky yarn and begin knitting with the big needles. Knit three rows and decrease twice in the same manner as the increases, on either side of the warmer. Knit a row and repeat the decreases. Knit a last row. Work an eyelet row of (YO, SSK). Knit till you have enough yarn to bind off with plus one yard.. I did two more rows and then bound off using the lace BO of *knit 1, YO, knit a second stitch*. Slip first two stitches over last stitch. Repeat. On the last stitch slip an empty needle into the first bound off stitch and hook the last stitch over that. Turn work right side out. Weave in ends. Take leftover yard of yarn and run through the eyelets and back through front. You can also use elastic as an way to help keep them up.
Repeat for other leg.
I think they are pretty awesome myself. And warm! :)
Friday, February 25, 2011
Blackberry Bag and a Cute Cat
I'm constantly dropping my phone in my purse with lots of pointy things.. stuff like knitting needles, keys, random twist ties, shiny rocks (just don't ask) and other bits and bobbles. A long while ago I'd made a little knitted lace bag for my camera. I figured why not toss one together for my Crackberry? (really, smart phones are crack imagine if you've never had one what it would be like to have a teeny tiny little computer in your pocket. Imagine...your favorite crap you do at home on the 'puter you can do waiting in line at the store.)
About a half skein of Suger'n Cream Twists in 'Vintage'
set of 5 US5 DPNs
Two pleasing beads to go on drawstring
You'll be working this bottom up. Using Turkish Cast On, cast on 6 stitches. Knit front/back in each stitch to create a total of 12. Arrange stitches equally over 4 needles (3 on each).
Increase as follows: Knit to last stitch on each needle. Knit it front and back. Repeat that for 6 rows, total of 32 sts. Knit two rows, and repeat increase stitches once for 36 total.
Knit all for five rows. Now for the Chart!
I just did this on one side and repeated it twice. I just wanted a little decoration, not a theme. Do as you like. This is what I did though. After repeating the chart twice, knitting uncharted back stitches, I knit five more rows. My Precious now fit quite well. Almost done, which was nice because I knit this thing tight.
Then I did the rows with holes to run the cords through.
1. K2tog, yarn over, knit two* repeat for row
2. knit all.
3. Knit two, yarn over, knit two together*repeat for row
4. knit all.
5. knit all
You can bind off at this point. Run a section of yarn or icord through the yarn over holes. Add the glass beads to the ends of the yarn, and tie them off. Keep your baby safer in your purse.. or fill the bag up with dice or condoms or shiny rocks. Your choice.
About a half skein of Suger'n Cream Twists in 'Vintage'
set of 5 US5 DPNs
Two pleasing beads to go on drawstring
You'll be working this bottom up. Using Turkish Cast On, cast on 6 stitches. Knit front/back in each stitch to create a total of 12. Arrange stitches equally over 4 needles (3 on each).
Increase as follows: Knit to last stitch on each needle. Knit it front and back. Repeat that for 6 rows, total of 32 sts. Knit two rows, and repeat increase stitches once for 36 total.
Knit all for five rows. Now for the Chart!
I just did this on one side and repeated it twice. I just wanted a little decoration, not a theme. Do as you like. This is what I did though. After repeating the chart twice, knitting uncharted back stitches, I knit five more rows. My Precious now fit quite well. Almost done, which was nice because I knit this thing tight.
Then I did the rows with holes to run the cords through.
1. K2tog, yarn over, knit two* repeat for row
2. knit all.
3. Knit two, yarn over, knit two together*repeat for row
4. knit all.
5. knit all
You can bind off at this point. Run a section of yarn or icord through the yarn over holes. Add the glass beads to the ends of the yarn, and tie them off. Keep your baby safer in your purse.. or fill the bag up with dice or condoms or shiny rocks. Your choice.
Friday, February 18, 2011
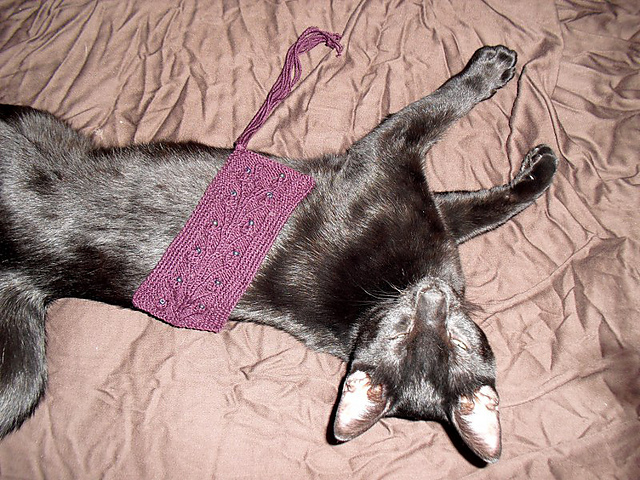
I've got a new pattern. A Nasturtium for your books.
The Zar Kitten approves.

Half the proceeds from sales will go to a breast cancer group. As soon as I can find one that isn't doing crap like suing people over silly crap that is. And it is plenty inexpensive... just a buck fifty!
Nasturtiums are vine growing, prolifically flowering plants that are easy to grow and will reward little effort with masses of white, orange and red flowers. They are also edible and make a nice spicy addition to a summer salad.
I miss the summer you see, I'm tired of looking at dark skies and the dreary greys and browns of the Northeast winter. I want my summer back. I'm ready to flop myself under a shady tree by some lovely flowers and read a good book in the afternoon heat.
I can't have all that warm and outside yet, but I can have my flowers. I hope you like them.
Half the proceeds from sales will go to a breast cancer group. As soon as I can find one that isn't doing crap like suing people over silly crap that is. And it is plenty inexpensive... just a buck fifty!
Nasturtiums are vine growing, prolifically flowering plants that are easy to grow and will reward little effort with masses of white, orange and red flowers. They are also edible and make a nice spicy addition to a summer salad.
I miss the summer you see, I'm tired of looking at dark skies and the dreary greys and browns of the Northeast winter. I want my summer back. I'm ready to flop myself under a shady tree by some lovely flowers and read a good book in the afternoon heat.
I can't have all that warm and outside yet, but I can have my flowers. I hope you like them.
Friday, February 11, 2011
Paintin' the Hooks Red! (With Beads and How-To)
So I'm a bit newish to beading. For the longest time it just didn't make sense. Then, I actually started to mess around with beads and hooks and yarn and bits of dental floss.
And I learned a few things.
First, it isn't that it is intuitive or that beading is hard. It is a bit unintuitive if you are used to using a crochet hook to actually crochet stuff. The dental floss thing makes sense after you do it.
Second. Beading projects tend to get messy. They are not travel friendly. Beads are small tricksy things that like to dive onto floors and scurry into the deepest darkest shadow they can... or at least the nook you have the most trouble getting them out of.
Thirdly, a single sized bead can be used on everything from fingerling to worsted.
Fourth, all steel crochet hooks look alike in the box..
I felt the second and fourth were issues that would impede my enjoyment of sticking bits of shiny glass on yarn. Must fix.
So , everything I've learned from other places and trial and error and what I will call pure idiot moments is here. Maybe it will be usefully to someone else.
First, the tools of the trade.
Don't mind my 5th hand crafting end table. It's a bit rough, but I don't feel bad if I spill paint on it.
The Basics
I use these items to knit with beads and or crochet with beads. You see here creamy beads in an old medicine container (keeps kids out), beads in a bead flat (works pretty good if you are somewhere with a table) and beads on safety pins.
Those pins are great if you want to bead in public or bead in a car or somewhere lacking table. You see a big bead on a pin, some dark shiny beads on a normal pin and a bunch of lighter shiny beads on a safety pin that I unbent. Depending on how handy you are with the pliers you can also bend the sharp tip of the pin into a hook and thus use your traveling bead holder as your beading hook as well. It's one less thing to drag around ya know? Just be careful not to jab yourself bending it...
Now for the things most people use for beading. Crochet hooks and dental floss. See the white thread there? That's floss. The travel size floss is behind the yarn. See the silver sticks with nail polish on them? Those are hooks that I have color coded. They are all about the same size. They range from 1.00 mm (the red one) to 3.5 mm (the black one). I use the tiny one to bead most yarns and the biggest one to grab dropped stitches in worsted projects. It was most annoying to grab the wrong one from my box o' crafting tools (because I can't be bothered to craft up a pretty tool holder.. I'd rather be making fun stuff!) So, I took some handy nail polishes and colored the end of each a different color. I marked the ones I used the most in the brighter/most noticeable colors. Now, it is very easy to grab the right one without having to always check the size. This was born of a pure idiot moment, heh. If you want to get all Martha on them.. you can do that too. I'd rather spend the time making other stuff though.
The yarns are Noro Kureyon and Rowan 4 Ply Soft. I have used these both with the same sized needle and bead. The Noro is a aran/worsted weight and the Rowan is a fingerling. Obviously, the bead was a bit tighter on the worsted yarn!
The Beads
Now, the beads I use are a size 6 bead. Seed beads have bigger inner holes I'm told; you can use a bigger hook with them, a 1.5mm steel hook (US 8, UK 4 1/2), and that combined with bigger hole means they are easier to get on bigger yarn. Regular sz 6 beads work better with a 1 mm hook (US size 12, UK size 6 1/2 and while you can use them with worsted, they slide better on smaller yarns. For most beaded knitting projects these sizes will do ya.
If you want a smaller bead on the smaller yarns or crochet thread (size 10 thread is what I've seen kicked around and it's roughly the same as lace-weight yarn or size 0 in the weight system), a size 8 will be what you need. You will need either a 1.0mm hook or possibly smaller. For thicker yarn, use a pony sized bead. Yes, they come in glass and other non-kiddie plastics. But, they are heavy. Use a regular small crochet hook or a 3.50/3.0mm hook.
How-To With a Hook
Now for a little how-to lesson. With pictures! Because that indeed makes it simpler.. What you see here is Premier Serenity sock yarn on size 1 needles. It's a fairly fine yarn. It will also be our beading modal.
First you knit the stitch to be beaded but don't pull the new stitch tight. Instead pull it loose on the needle. Stick a bead on your hook.
Replace the needle with your hook.
Now slide the bead over onto the yarn.
After sliding the bead onto the yarn remove hook, replace the knitting needle in the loop above the bead and pull the stitch tight as the rest.
For Dental Floss
I use this when my bead hole is too small for the hook or when the small hook would shred the yarn. It's not my favorite way to do things but it does work. Start the same way as with the hook method. Knit the stitch. Pull the loop loose and off the needle. Slide one end of the floss through the yarn loop. Pull taunt, but not so hard you are messing up the gauge.
Stick the ends of the floss together. Feel free to lick the ends to make them stick together if needed. Slide bead onto floss.
Slide bead down floss and over onto the yarn.
Now, just slide that loop above the bead back on the needle, tighten that stitch up and keep on trucking.
Now, I have yet to pre-bead yarn. I like sticking mine on as I go. I'm told one of the easiest ways to do this is to use a BigEye needle. They sell them where you get beading supplies. Or, you can use beading wire or dental floss. Instead of flossing onto one stitch, you just keep pulling those beads down the strand. One day I'm going to try this though.
And I learned a few things.
First, it isn't that it is intuitive or that beading is hard. It is a bit unintuitive if you are used to using a crochet hook to actually crochet stuff. The dental floss thing makes sense after you do it.
Second. Beading projects tend to get messy. They are not travel friendly. Beads are small tricksy things that like to dive onto floors and scurry into the deepest darkest shadow they can... or at least the nook you have the most trouble getting them out of.
Thirdly, a single sized bead can be used on everything from fingerling to worsted.
Fourth, all steel crochet hooks look alike in the box..
I felt the second and fourth were issues that would impede my enjoyment of sticking bits of shiny glass on yarn. Must fix.
So , everything I've learned from other places and trial and error and what I will call pure idiot moments is here. Maybe it will be usefully to someone else.
First, the tools of the trade.
| Knitting with beads tools. |
Don't mind my 5th hand crafting end table. It's a bit rough, but I don't feel bad if I spill paint on it.
The Basics
I use these items to knit with beads and or crochet with beads. You see here creamy beads in an old medicine container (keeps kids out), beads in a bead flat (works pretty good if you are somewhere with a table) and beads on safety pins.
Those pins are great if you want to bead in public or bead in a car or somewhere lacking table. You see a big bead on a pin, some dark shiny beads on a normal pin and a bunch of lighter shiny beads on a safety pin that I unbent. Depending on how handy you are with the pliers you can also bend the sharp tip of the pin into a hook and thus use your traveling bead holder as your beading hook as well. It's one less thing to drag around ya know? Just be careful not to jab yourself bending it...
Now for the things most people use for beading. Crochet hooks and dental floss. See the white thread there? That's floss. The travel size floss is behind the yarn. See the silver sticks with nail polish on them? Those are hooks that I have color coded. They are all about the same size. They range from 1.00 mm (the red one) to 3.5 mm (the black one). I use the tiny one to bead most yarns and the biggest one to grab dropped stitches in worsted projects. It was most annoying to grab the wrong one from my box o' crafting tools (because I can't be bothered to craft up a pretty tool holder.. I'd rather be making fun stuff!) So, I took some handy nail polishes and colored the end of each a different color. I marked the ones I used the most in the brighter/most noticeable colors. Now, it is very easy to grab the right one without having to always check the size. This was born of a pure idiot moment, heh. If you want to get all Martha on them.. you can do that too. I'd rather spend the time making other stuff though.
The yarns are Noro Kureyon and Rowan 4 Ply Soft. I have used these both with the same sized needle and bead. The Noro is a aran/worsted weight and the Rowan is a fingerling. Obviously, the bead was a bit tighter on the worsted yarn!
The Beads
Now, the beads I use are a size 6 bead. Seed beads have bigger inner holes I'm told; you can use a bigger hook with them, a 1.5mm steel hook (US 8, UK 4 1/2), and that combined with bigger hole means they are easier to get on bigger yarn. Regular sz 6 beads work better with a 1 mm hook (US size 12, UK size 6 1/2 and while you can use them with worsted, they slide better on smaller yarns. For most beaded knitting projects these sizes will do ya.
If you want a smaller bead on the smaller yarns or crochet thread (size 10 thread is what I've seen kicked around and it's roughly the same as lace-weight yarn or size 0 in the weight system), a size 8 will be what you need. You will need either a 1.0mm hook or possibly smaller. For thicker yarn, use a pony sized bead. Yes, they come in glass and other non-kiddie plastics. But, they are heavy. Use a regular small crochet hook or a 3.50/3.0mm hook.
How-To With a Hook
| Making a sock.. |
First you knit the stitch to be beaded but don't pull the new stitch tight. Instead pull it loose on the needle. Stick a bead on your hook.
| black size 6 seed bead on 1.00mm hook |
| Your hook is now the needle. |
| The bead is now on the yarn. BEADED!! |
For Dental Floss
I use this when my bead hole is too small for the hook or when the small hook would shred the yarn. It's not my favorite way to do things but it does work. Start the same way as with the hook method. Knit the stitch. Pull the loop loose and off the needle. Slide one end of the floss through the yarn loop. Pull taunt, but not so hard you are messing up the gauge.
| Floss in knitted loop, bead waiting on table. |
| And bead is on the floss! |
| Whee!!! You're beaded! |
Now, just slide that loop above the bead back on the needle, tighten that stitch up and keep on trucking.
Now, I have yet to pre-bead yarn. I like sticking mine on as I go. I'm told one of the easiest ways to do this is to use a BigEye needle. They sell them where you get beading supplies. Or, you can use beading wire or dental floss. Instead of flossing onto one stitch, you just keep pulling those beads down the strand. One day I'm going to try this though.
Tag!
beading,
crochet hook,
floss,
how to,
how-to,
knitting,
Noro Kureyon,
tutorial,
yarn
Friday, January 14, 2011
Tiny dog needs help (not mine!)
Backstory: http://pleasehelptristan.chipin.com/tristans-leg-surgery
Spare some change for this lil guy? He reminds me of my old cat with the bum leg. Poor thing.
Wednesday, January 12, 2011
Diamond in the Rough.
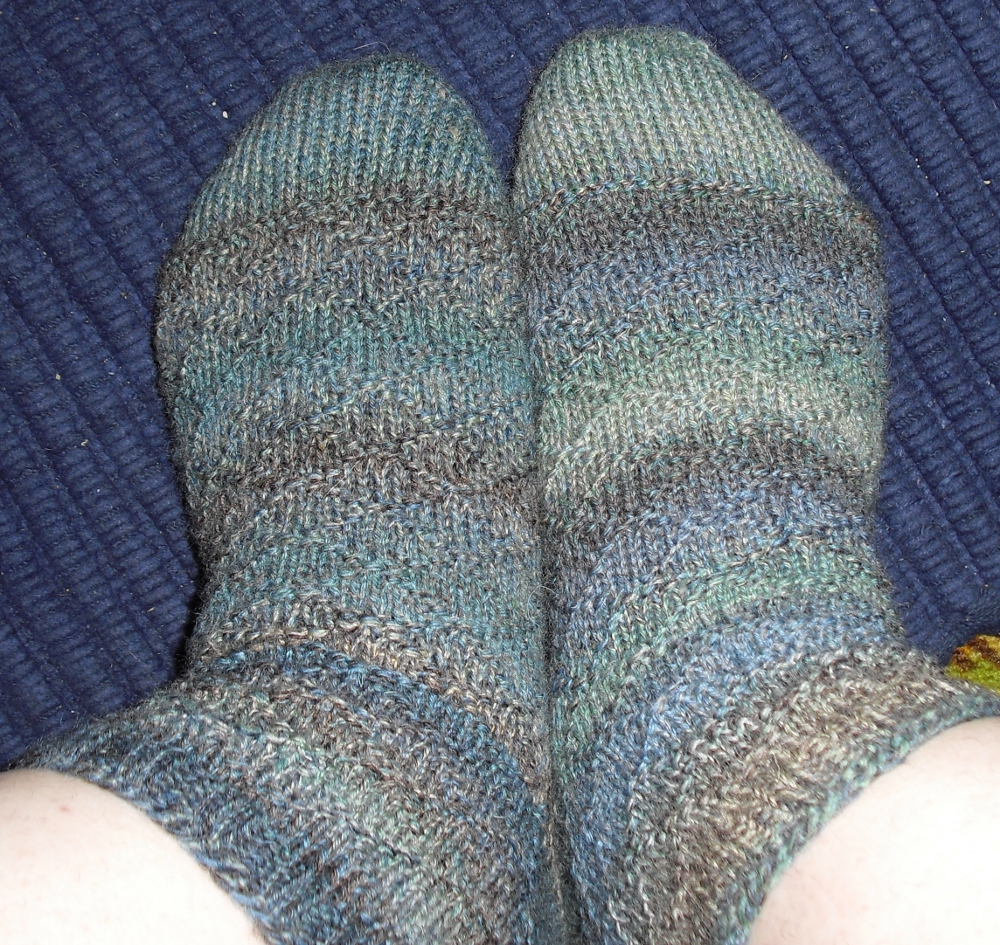
This patten assumes some basic toe up sock construction knowledge. It came to be as I was in a place where working any sort of complex pattern would be impossible... but I would have been bored to bits working a plain sock. I was also using Patons Kroy FX. It is a yarn which has continuous color shifts using changing colors spun together instead of a single spun strand that is simply dyed. I wanted to showcase this feature of the yarn. It was why I had chosen the yarn in the first place! I love this look.

I had bought two skeins of several colors of this stuff on sale... so I used a single skein per sock. This was enough for a sock, but if you like knee highs or have really big feet to cover you may want a third skein. Also this pattern assumes you know things like Turkish cast on and how to do a short row heel. Don't sweat if you don't...that's what google is for. :) Lastly, if you like this pattern, please consider making a donation to either breast cancer research or an animal shelter. If you are broke, you can always just give a click. If there are any mistakes in this pattern, my apologies. Just let me know via comments. Some sizing is possible. 6 diamonds from the center fits my US woman size 9 foot very well. Another repeat to 7 diamonds fits my US 11 man. Adjust as you need.
THE SOCK
2 skeins of Paton's Kroy FX
One set of 5 US size 2 needles (or circ equivalent)
You need to be able to knit/purl, knit front/back, and turn a short row heel as well as an YO Bind-off
Using a Turkish cast on, CO 8 sts over 4 needles. Knit one row and place a marker.
Increase to 64 in the following manner:
1. From marker, knit one. Knit front/back, knit to one stitch before end of second needle, knit front/back. Knit last stitch. Knit one stitch on third needle. Knit front/back. Knit to second to last stitch on fourth needle. Knit front/back. Knit last stitch.
2. Knit all to marker.
Once you have increased to 64 sts total you begin the sock pattern.
Purl across the instep, knit across the sole. Begin diamond pattern on instep.
1. p1, k7. Repeat across instep. (To even out the pattern slip first stitch of third needle onto second needle to be purled.)
2. k1, p1, k5, p1 Repeat
3. k2, p1, k3, p1, k1 Repeat
4. k3, p1, k1, p1, k2 Repeat
5. k4, p1, k3 Repeat
(All rows on sole are plain knit.)
Continue till long enough,being sure to end on row 1 of pattern.
Do short row heel. It will be divided as 11 sts wrapped, 10 center sts and 11 sts wrapped. Begin pattern (if desired) on back of leg on final knitted row.
Work at least 4 repeats of diamond pattern on leg. When finished, knit two rows before beginning k2, p2 ribbing. Work ribbing for 6 rows (or more if yarn and desire to rib are sufficient) before binding off in the YO stretchy bindoff. Enjoy your subtle but super socks.
I had bought two skeins of several colors of this stuff on sale... so I used a single skein per sock. This was enough for a sock, but if you like knee highs or have really big feet to cover you may want a third skein. Also this pattern assumes you know things like Turkish cast on and how to do a short row heel. Don't sweat if you don't...that's what google is for. :) Lastly, if you like this pattern, please consider making a donation to either breast cancer research or an animal shelter. If you are broke, you can always just give a click. If there are any mistakes in this pattern, my apologies. Just let me know via comments. Some sizing is possible. 6 diamonds from the center fits my US woman size 9 foot very well. Another repeat to 7 diamonds fits my US 11 man. Adjust as you need.
THE SOCK
2 skeins of Paton's Kroy FX
One set of 5 US size 2 needles (or circ equivalent)
You need to be able to knit/purl, knit front/back, and turn a short row heel as well as an YO Bind-off
Using a Turkish cast on, CO 8 sts over 4 needles. Knit one row and place a marker.
Increase to 64 in the following manner:
1. From marker, knit one. Knit front/back, knit to one stitch before end of second needle, knit front/back. Knit last stitch. Knit one stitch on third needle. Knit front/back. Knit to second to last stitch on fourth needle. Knit front/back. Knit last stitch.
2. Knit all to marker.
Once you have increased to 64 sts total you begin the sock pattern.
Purl across the instep, knit across the sole. Begin diamond pattern on instep.
1. p1, k7. Repeat across instep. (To even out the pattern slip first stitch of third needle onto second needle to be purled.)
2. k1, p1, k5, p1 Repeat
3. k2, p1, k3, p1, k1 Repeat
4. k3, p1, k1, p1, k2 Repeat
5. k4, p1, k3 Repeat
(All rows on sole are plain knit.)
Continue till long enough,being sure to end on row 1 of pattern.
Do short row heel. It will be divided as 11 sts wrapped, 10 center sts and 11 sts wrapped. Begin pattern (if desired) on back of leg on final knitted row.
Work at least 4 repeats of diamond pattern on leg. When finished, knit two rows before beginning k2, p2 ribbing. Work ribbing for 6 rows (or more if yarn and desire to rib are sufficient) before binding off in the YO stretchy bindoff. Enjoy your subtle but super socks.
Working Away Here
The last couple of weks here have been rather difficult. But, I have had a few small pleasures. One of those pleasures was (and is) this super simple sock pattern that I will be sharing as soon as I get a few pictures. There is another pattern I will be dedicating to my mother. See, I worked it the night I watched over her. She liked owls....and there are four of us. Both of these will be up here soon. I just need a bit of time.
...and a few other patterns that I'll be hoarding for a bit longer.
Sunday, December 19, 2010
Que sera, sera.
I lost my mother at dawn December 16th 2010. She was a Scorpio, a brunet, a lady who'd play Duke Brothers with the local popo and a lady who'd take in stray kittens and kids. She'd fought cancer for over 6 years and her body just finally gave out. Her mind was sharp as all hell all the way.
She fought hard that night, refused the morphine, and even said she didn't want to go when my brother broke down. She hung on till he was more ready... if such a thing could be said. Finally, very late that night when all was quiet she said "OK, I'm ready now" clearly without the slurring that had stolen her voice earlier. Those were her last words. As the sun rose she was gone.
And she was smiling.
And here is some mom music for everyone. Stuff she liked. Stuff she played and listened too. You get the idea.
Bobby McGee
She used to play this. It is making me cry to hear this.
Freaker's Ball
She had this album (and others very much like it on vinyl) and we'd play it as kids and ask her what it was all about and she'd just laugh and say we'd find out. My mom was a damned hippie.
These are others she had too.
That first picture of the bridge. She took one just like that the first time she took me there when I was tiny to see family.
Love ya mom. Come visit sometime.
Saturday, June 12, 2010
Saturday, May 1, 2010
The Birthday Socks
I just turned 30. I'm still not sure how I feel about this event. What I do know is that it was a beautiful wonderful lovely warm day (and the nieghbourhood kids were in hiding! Yes!) and I couldn't enjoy it due to my back deciding it needed to pinch the sciatic nerve and leave me turtled all day.
Still hurts. Damn you, nerves. Perhaps more frozen spinach will help the pain (as far as I'm concerned frozen spinach is only good for a cold compress).
I did manage to finish my birthday socks. See, the first one is a Nixen-Socken.
Loved how it twisted as originally worked; when mirrored by its mate it looks even cooler. As it seemed a shame to hoard the mirror-pattern... I share it! (Please see link for other pattern)

This is a really easy pattern. Any questions, ask or google. Your choice!
Left of Nixen
sts - stitches
st - stitch
k - knit
k-f/b - knit front and back loops
w/t - Wrap and Turn
SSK -slip 2 sts as if to knit, knit together
YO - yarn over
I used a skein of Plymouth Socketta yarn in Plum colorway. It reminds me of a spring flower or a warm evening's sunset..so it's perfect for this time of year. It's also a nice cotton/wool blend which seems like it would make a nice breath-y summer sock.
I used a set of 5 US2 DPNs. I'm a US size 9.5, give or take.
To re-size remember this stitch pattern is worked over 6 stitches!
I did these toe-up (I'm rather hooked). I cast on 16 stitch total, 8 on each of two needles, Turkish style. I love this cast on but you can use whatever on you prefer.
Knit the first row, knitting 4 stitches onto 4 different needles (so it will be 4, 4 4, 4). Pull the tail though the stitches as a row end marker (or add a row end marker)
Next row after slipping marker knit one, knit front and back, knit rest of needle.
Second needle: knit 2. Knit-front-back loops, knit one.
Third needle: knit one, knit front-back loops, knit two.
Fourth needle: knit two, knit front-back loops, knit one. You will be at start of new row and will have increased 4 stitches.
Continue in this fashion:
ROW 1 K1, K-f/b, knit to last 2 sts (on next needle). K-f/b, K2, K-f/b, knit to last two stitches. K-f/b, K1 (At stitch marker)
ROW 2 Knit all
Repeat these two rows until you have 66 sts (or resized number divisible by 6!). When 66 sts are reached, work the foot of the sock in stockinette until the sock is two inches shorter then the foot. You are now ready to start a short row heel.
(Seriously, these are easier then heel flaps!)
Place the bottom 30 sts on a single needle for the sole. There will be 36 instep stitches. Double check that you are not twisting the body of the sock so that the toe is all weird. (Yes.. I have done this.)
Row 1 Knit to the last stitch of the heel needle. Wrap and Turn that last stitch.
Row 2 Purl across the heel needle until you reach the last stitch. Wrap and Turn Purlwise that stitch.
Repeat these two rows until you've ten stitches on each side wrapped (total of twenty wrapped stitches) and ten unwrapped stitches in the middle.
Now, pick up the first wrapped stitch, and knit (as one) the wrap and the stitch.
Turn work, slip one st, purl across to first wrap on the other side and repeat the pick up purlwise. (slight difference)
Turn, Slip one and knit to first un-worked wrap. Pick up.
Repeat this procedure until all wrapped stitches are worked and heel is complete.
Congrats. Mostly done!
Knit 6 rows (or more if you want the lace further from the heel)
Begin pattern at beginning of 7th row.
ROW 1 *2k, SSK, 2k, YO* Repeat this stitch pattern. Be careful not to loose any stitches as the YO's are at the end of the repeat!
ROW2 KNIT ALL (Original calls for a purled row between lace.. if you want to match existing socks which are purled between pattern rows.)
Repeat this till desired sock size. My little summer socks have 12 repeats of these two rows. (24 rows total)
To end, I worked three rows of 3x3 ribbing. I knit the first three sts (the higher part of the lace), and purled the last three (lower part of the lace).
Bind off as follows for a lacy very stretchy edge: Knit one. Yarn Over. Knit one. Slip needle under YO and leftmost stitch and slide both over the right most stitch. Repeat. Use a little crochet hook if it proves difficult to slide the YO and lift knit st over the right st. Use that same hook to slide the yarn tail though the very first bound off stitch to avoid a gap in the edge.
Tuck in yarn ends and enjoy!
For the record, my pattern makes ones that look like the sock with the yellow at the top. It mirrors the Nixen pattern. Please do not profit from this pattern. If anyone asks for this, send them back here to get it themselves. :)
Still hurts. Damn you, nerves. Perhaps more frozen spinach will help the pain (as far as I'm concerned frozen spinach is only good for a cold compress).
I did manage to finish my birthday socks. See, the first one is a Nixen-Socken.
Loved how it twisted as originally worked; when mirrored by its mate it looks even cooler. As it seemed a shame to hoard the mirror-pattern... I share it! (Please see link for other pattern)
This is a really easy pattern. Any questions, ask or google. Your choice!
Left of Nixen
sts - stitches
st - stitch
k - knit
k-f/b - knit front and back loops
w/t - Wrap and Turn
SSK -slip 2 sts as if to knit, knit together
YO - yarn over
I used a skein of Plymouth Socketta yarn in Plum colorway. It reminds me of a spring flower or a warm evening's sunset..so it's perfect for this time of year. It's also a nice cotton/wool blend which seems like it would make a nice breath-y summer sock.
I used a set of 5 US2 DPNs. I'm a US size 9.5, give or take.
To re-size remember this stitch pattern is worked over 6 stitches!
I did these toe-up (I'm rather hooked). I cast on 16 stitch total, 8 on each of two needles, Turkish style. I love this cast on but you can use whatever on you prefer.
Knit the first row, knitting 4 stitches onto 4 different needles (so it will be 4, 4 4, 4). Pull the tail though the stitches as a row end marker (or add a row end marker)
Next row after slipping marker knit one, knit front and back, knit rest of needle.
Second needle: knit 2. Knit-front-back loops, knit one.
Third needle: knit one, knit front-back loops, knit two.
Fourth needle: knit two, knit front-back loops, knit one. You will be at start of new row and will have increased 4 stitches.
Continue in this fashion:
ROW 1 K1, K-f/b, knit to last 2 sts (on next needle). K-f/b, K2, K-f/b, knit to last two stitches. K-f/b, K1 (At stitch marker)
ROW 2 Knit all
Repeat these two rows until you have 66 sts (or resized number divisible by 6!). When 66 sts are reached, work the foot of the sock in stockinette until the sock is two inches shorter then the foot. You are now ready to start a short row heel.
(Seriously, these are easier then heel flaps!)
Place the bottom 30 sts on a single needle for the sole. There will be 36 instep stitches. Double check that you are not twisting the body of the sock so that the toe is all weird. (Yes.. I have done this.)
Row 1 Knit to the last stitch of the heel needle. Wrap and Turn that last stitch.
Row 2 Purl across the heel needle until you reach the last stitch. Wrap and Turn Purlwise that stitch.
Repeat these two rows until you've ten stitches on each side wrapped (total of twenty wrapped stitches) and ten unwrapped stitches in the middle.
Now, pick up the first wrapped stitch, and knit (as one) the wrap and the stitch.
Turn work, slip one st, purl across to first wrap on the other side and repeat the pick up purlwise. (slight difference)
Turn, Slip one and knit to first un-worked wrap. Pick up.
Repeat this procedure until all wrapped stitches are worked and heel is complete.
Congrats. Mostly done!
Knit 6 rows (or more if you want the lace further from the heel)
Begin pattern at beginning of 7th row.
ROW 1 *2k, SSK, 2k, YO* Repeat this stitch pattern. Be careful not to loose any stitches as the YO's are at the end of the repeat!
ROW2 KNIT ALL (Original calls for a purled row between lace.. if you want to match existing socks which are purled between pattern rows.)
Repeat this till desired sock size. My little summer socks have 12 repeats of these two rows. (24 rows total)
To end, I worked three rows of 3x3 ribbing. I knit the first three sts (the higher part of the lace), and purled the last three (lower part of the lace).
Bind off as follows for a lacy very stretchy edge: Knit one. Yarn Over. Knit one. Slip needle under YO and leftmost stitch and slide both over the right most stitch. Repeat. Use a little crochet hook if it proves difficult to slide the YO and lift knit st over the right st. Use that same hook to slide the yarn tail though the very first bound off stitch to avoid a gap in the edge.
Tuck in yarn ends and enjoy!
Monday, April 19, 2010
The Boyfriend Sock Saga
Sometimes I'm a bad girlfriend.
Yeah, you heard me. For example. Many moons ago I told the boyfriend I'd make him some socks. And, I kind of have. House socks in some fugly Red Heart yarn of his own choice. I didn't pick this out nor do I understand just why he seems to be drawn to the fugly Red Heart multis (my skein of neon pink and red, let me show you it. Why lord? Why!??) Now, I don't mind Red Heart in its place. It makes great blankets and hard wearing items.... and after a wash and dry or three these will be very soft and comfy for around the house. It's his color scheme I don't get.
....and then when I went home I left said second sock on the US5 brand new bamboo needles laying in my mother's bedroom... I'd been in there watching TV with the small nephew beast. (We were avoiding his crabby mother.) Major Xmass sock fail. No sock and no needles. Sad Kat.
And time passes. I get teased about the lacking socks. I make socks for others; I make socks for me. The mom keeps saying she'll mail out my needles (and his sock) and instead just keeps adding to the box to be sent out. Our deteriorating car prevents a quick trip out. Thick house sock weather is almost over anyways.
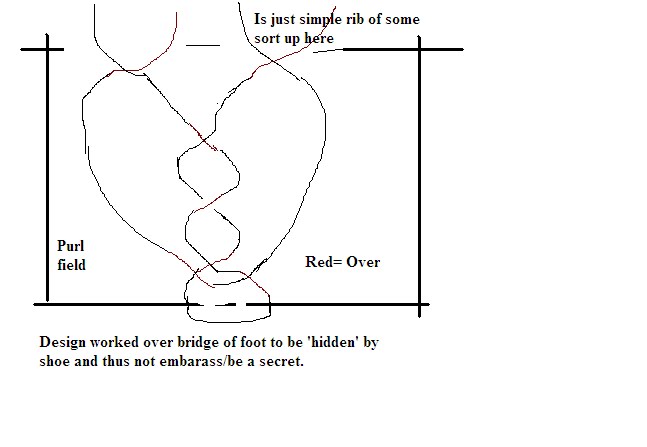
And I get a coupon for Knit Picks and an idea for fun to make manly socks. As his feet are huge.. they will be in sport weight. I picked a very nice dark green solid and a dark grey for a toe, These are both colors he likes. And, I've charted up a awesome knot for the sock. Squee. Anyways, here is the initial sketch; it doesn't look that much like this in the final form. I've finally charted it... and look forward to the knitting of it. If it looks good I'll release it as a pattern.

Yeah, I think he'll like the birthday present. *is smug*
Naturally, as soon as this idea struck me and I bought the yarn (en route) we started to plan a me and tiny dog only trip east. So, yeah, I will get my needles and he will also get his Red Heart Socks!
Thing is the nephew just had a birthday (which no one bothered to tell me about till after it happened) and my cash flow is rather not there for a nice gift...his mother would die if I thrifted him anything and she found out about it... so I'm crocheting up something.
Apparently he was given a goldfish at a party he went to. Don't ask, I don't agree with giving any animal as a gift but what is done is done. I'm thinking a golden fishie will be just the thing.
Wednesday, April 14, 2010
CABLE WORK!!!!
(this was part of a prior post but I edited to expand here)
Cables. Cables are fun, cables are dandy... if you get one wrong you're in for a treat. This is a test project panel over 80 stitches wide, no repeats and no surrender. See, I've done cables before. I love the way they look on flatwork. I love them on socks. I love them on pillows and hats.
I thought to myself.. 'Kat, you love cables, you even designed a very simple X and O cabled glove (free on rav)... this lady makes awesome and awe inspiring cabled projects and well.. she needs test knitters....'
Sweet.
I didn't realize just how big it was. Nor did I realize that this is a non repeating pattern. And my first try was on dark green yarn. I've ripped it out and restarted more times then I care to count.
But.. I have grown as a knitter and have learned a new technique. Crocheting the mistake. You need a screwed up cable (6 or more rows down seemed to be when I noticed the problems) a number of DPNs/extra cable needles and a few small crochet hooks. (Mine were a D and an F and I was knitting with US 10 needles and worsted weight Red Heart yarn) You want to be able to have plenty of loose yarn around said hook. Oh, and a good picture or great chart of whatever you are doing is helpful!
Anyways all you do is slide the stitches to be reworked off the knitting needles. Secure the points (I stuck point protectors on mine) so no other stitches would slide off. You can unraval with the little hook pairs of stitches down to the issue and fix them pair by pair (or trio by trio) like I did with the smaller fixes.. or just yank down the entire section (as in the picture) and rework the entire piece till it looks correct. This was a 6 stitch rip down through 10 rows. I'd 4 needles holding pairs of stitches here and there as I retwisted and reworked them.
I'd miss-crossed on the first cross which was ruining the look..and forgotten to cross two others. Took almost two hours... but compared to the ten-fifteen hours it would have taken to restart the work.. Yup.
Some others reknit the ripped section. I think hooking up as for a dropped stitch is faster. YMMV.
Things I have learned about complex cabling.
(thanks to a fellow Ravelry member faeriesandpixies and others)
1. Color the different cable stitches in both your legend and the chart. Color one cable cross at a time, for the entire chart (say, starting with c2 over 2left). You will then see how that cross moves through your chart. This will be the visual representation of your pattern and will be really helpful as you knit
2. Study the differences in the cable stitches. You don’t need to memorize them, just understand them. (Hint: basically there are only two kind of cables, left- and right-leaning, or left- and right-crossing. After that, the differences are in how many stitches are crossed, what kind of stitch is crossed, and what kind of stitch is in the background. Usually the knits are crossed and the purls are in the background. And they are in this pattern.)
3. Try to use a light-colored wool or wool/blend yarn.
4. Mark off each row that you have completed. Everyone occasionally forgets what row they are on. Try to do each RS(odd #s) and it’s following WS(even #s) row in one sitting. Then look at your work to make sure it’s correct. Stopping and starting mid-row tends to make for mistakes. Knitting cables is alot about attention span and concentration (both I struggle with from time to time :).
5. Cover the rows above the working row.
6. Set yourself some goals. Do two rows, have a soda, then eight more, have a tea, then ten more.
Yeah... I'm glad I'm doing this. I'm just that much closer to writing another pattern of my own...with cables. Now I should stop procrastinating on this here blog and go finish the thing.
Subscribe to:
Posts (Atom)