This is Zarathustra. He's..... very helpful.
So I put stuff on him.
Any questions?
This is Kat's Writing.
Relax.
Enjoy.
Do not be too alarmed at life nor too complacent in the world. There may be alarming things here. There may not be. Have I mentioned scatological yet?
Nightmare
Friday, April 20, 2012
What I found and what I did to it.
Whilst out thrifting (looking for the fabled fake satin nightgowns they don't make anymore for my gram) I found a treasure trove of silk.
This was one of the things.
It's a large heavy silk scarf. Because of where I am it is most likely someone's old hijab scarf. It's hand rolled, in great new shape...but a bit 'old' for me.
So I made it purple. Two packs of cherry koolaide and two packs of grape and a slow boil in a glass pot.
The new color makes it much more acceptable print-wise.
Cream with print is old lady. But purple with print is retro and is thus good. I am much pleased. Not bad for two bucks, eh?
This was one of the things.
![]() |
| A bit old fashioned, no? |
So I made it purple. Two packs of cherry koolaide and two packs of grape and a slow boil in a glass pot.
![]() |
| Mmmm smells yummy. |
![]() |
| The color suits me. |
Thursday, March 15, 2012
Awesome Recent Thrift Store Finds!
I scored these within the last two weeks. This much awesome in such a short time frame needs to be shared.
First, a brand new with the tags fancy shmancy dress.
It's some sort of stretchy knit with a gauzy over layer. It is a tiny bit loose (I've put it on twice now and only noted the zipper in the back after the last time I took it off.) but not loose enough to fiddle with. Fun story with this one? It was a bit pricey for a thrift store find.. even as a new dress. I hid it for two weeks and came back on a half off day. I look damned sexy in it too. (Modesty, I have it.)
Next, found the same day as the slinky purple dress.. Gothy lace over dress!
This laces up the back, corset style and is gored to give an almost circular effect. It's also see through. The cashier said that she had one very similar as a wedding dress (only difference was hers was white) and hers was $250 to my $3. I will need some sort of liner unless I intend on showing off my bra set. I intend to cut off the sleeves and either make straps or more Victorian period-ish sleeves.
First, a brand new with the tags fancy shmancy dress.
![]() |
| I love the faux diamond and silver shoulder clasps. In person it's a deep plum. |
Next, found the same day as the slinky purple dress.. Gothy lace over dress!
![]() |
| So goffy. It looks like something the lead singer of the Smashing Pumpkins once wore. The color is a dusty grape-purple. |
Friday, January 27, 2012
A Silken Sewn Scarf. Also. Cats. Where they do not belong.
![]() |
| It lies.. looking so simple.. |
Before most of my projects (with silk) were small or the seams were easy to hide. Or, the kind of silk was rougher AKA simpler to work with.
Not this gal! After carefully reclaiming the silk from an older and way too large shirt I set to make myself a nice scarf for summer. I wanted to be able to tie it around my head to keep the sun off. And.. the seams would have to show. Since it is a scarf, you see.
At first I was going to just roll the edges. My machine has a roller foot. But then.. there was no roller foot to be found. I lost my roller foot!??! (I found it halfway through this project. Gah.)
OK. Internet tells me I can 'wrap' the seams for a nice smooth look with silk. OK. The instructions called for a steaming clothes iron. I don't even have a regular clothes iron!!! I hate irons so I don't have one. It was a running joke with my mother that sometime this would haunt me.
But I am going to do this. Hell or high water. I'm not a beginning seamstress.. more like a skilled amateur. This is JUST a big square! With little rectangles sewn on! Easy! Super easy! I mean.. I can make actual clothes!
And 4 hours later I had a scarf. It took me that long to sew up all those seams.. holding them carefully make sure nothing was bunched, everything was flat and the finished piece would look nice.. and seeing as silk migrates even if you pin that shiesse down.. it was even more fun. Fun I say.
BAH. I have enough silk from other too big shirts for a few more scarves... guess who is getting an iron. Any iron. My mom is probably laughing at me from somewhere.
And this didn't make sewing any easier either. Cats!
![]() |
| First Mac kept trying to steal the pile of fabric I was sorting. |
![]() |
| And then the other one, Zar just had to supervise up close and personal. |
Friday, January 20, 2012
Sewing Stuff for Fun
I was digging through clothes the other day. Just sorting out stuff to take out to the good will. And I found a shirt of my late mothers. It was pink and had a lovely flower print on it. And even though pink is very not my color I kept it..because my mum liked it.
But I haven't worn it in a year... and I am trying to downsize. But I didn't want to get rid of it! So. I am making it into something else. I am making...a kerchief..a headband.. and maybe scrunchies.
I'm not too sure about this color by my face..but if I don't like it I can find someone who will.
| Sewing Machine! With sewing! |
I'm not too sure about this color by my face..but if I don't like it I can find someone who will.
Friday, January 13, 2012
A Friday the 13th Good Luck Charm
My sister has been feeling a mite haunted lately. Her son (and another small boy) have had seriously bad nightmares or perhaps.. are actually sensing something.
Weather or not you believe it is ghosts, the products of our own psyche, the devil in red tights, a demon from beyond or any other thing is immaterial. Something is bothering them. And so, like any big sister I set out to help a little if I could.
And, I like runes. So I made her this:
Now you may be thinking.. but that is not KNITTING!!!! Well of course it isn't, you cute twit. It is loom woven beadwork. I have this 8 dollar kid's bead loom and my adult butt has been loving the crap out of it. I haven't quite figured out how to attach the beaded lovelies to say.. leather yet.. without it looking a bit weird. But, these are pretty on their own and can make nice pieces on their own merits.
Weather or not you believe it is ghosts, the products of our own psyche, the devil in red tights, a demon from beyond or any other thing is immaterial. Something is bothering them. And so, like any big sister I set out to help a little if I could.
And, I like runes. So I made her this:
| Algiz, the Rune of Protection. |
Wednesday, December 21, 2011
HOW TO: Sew up some Square Pads! (Part 2)
HOW TO: Sew up some Square Pads! (Part 1)
Several months ago I made me a stack o' pads. Yes, ladies THOSE pads. Gentlemen.. this may not be a post for you.
I made all different shapes and a few sizes. I followed quite a few tutorials.. but none of them pleased me. Most were too fiddly.. or used non-breathing fabric.. or something.
I found the circle pads tended to bunch up..but that may have been my thighs. I'm thick.
The ones shaped like commercial pads took forever to dry.
"Inserts" SUCK.
My favorite ones to wear ended up being folded squares and for light days.. a sort of winged rectangle. I then tested them for months. I likey. And, there aren't too bad to make either!
This is a very visual post. Easier that way.
You will need:
Roughly 3 yards of a cotton flannel.
About a half yard of some sort of silky fabric. I used a scrap of fake silk.
Pair of athletic socks.
Sewing Machine (this could be a hand sewn project if you are into that.)
A packet of metal snaps.
Thread. One dark, one light.
Sewing needle.
Ruler.
I made all different shapes and a few sizes. I followed quite a few tutorials.. but none of them pleased me. Most were too fiddly.. or used non-breathing fabric.. or something.
I found the circle pads tended to bunch up..but that may have been my thighs. I'm thick.
The ones shaped like commercial pads took forever to dry.
"Inserts" SUCK.
My favorite ones to wear ended up being folded squares and for light days.. a sort of winged rectangle. I then tested them for months. I likey. And, there aren't too bad to make either!
This is a very visual post. Easier that way.
You will need:
Roughly 3 yards of a cotton flannel.
About a half yard of some sort of silky fabric. I used a scrap of fake silk.
Pair of athletic socks.
Sewing Machine (this could be a hand sewn project if you are into that.)
A packet of metal snaps.
Thread. One dark, one light.
Sewing needle.
Ruler.
| Moon pads in a basket! |
Friday, September 23, 2011
A Mabon Crocheted White Oak Leaf (Pattern)
| A mini-alter for Mabon. |
While not one of the 'big' pagan holidays, and coming soon after Lughnasadh (the first harvest) it is a nice way to mark the equinox and the true change of seasons.
This is the time of the Dark Mother, the Crone, and when we begin to see the earth dieing into a deep sleep, when the plants go brown and dormant..or dead... and the wild animals find snug dens for the coming hardship. The Harvest Moon has come and gone and now it is truly autumn and the nights grow chill as we contemplate what comes afterward.
But it isn't that cold yet. First comes the turning and falling of the leaves! And so I made some leaves for my alter! (and my hair too!) Please note that these are made to not lie flat. True, real fallen oak leaves are not flat things and neither did I feel that my Mabon decor should be flat things.
And why white oak in particular instead of generic 'leaf'?
My grandparents yard has two huge white oaks. There used to be 4 huge old oaks but the two nearest the house worried them... and so now there are 2. I like these tress. Big, messy with acorns and twigs and leaves.. but I like them. They are friendly trees. They also have oddly shaped, randomly pointed leaves.. so does my pattern!
Big White Oak Leaf.
Needed:
Roughly 60 yards of WW in an earthy/leafy color and a crochet hook that is properly sized. I used Peaches and Cream in 'Good Earth' and a 4.5 mm hook.
Beads, if you want to randomly bead your leaves. (This is done much like beading a knit project with a tiny crochet hook and drawing the bead over the stitch.) Size 2/0 in Ruby mix is what I have used here.
hdc - half double crochet
dc - double crochet
sc- single crochet
dr - decrease
in - increase
st - stitch
sls - slip stitch, generally worked straight into lower row to begin a chain
(All are American crochet terms!)
1. Chain 28+2, work hdc into third loop from hook.
2. 17 dc, leaving a 'stem' chain. Slip st into 18th st. Chain 20.
3. Work hdc into third loop from hook, hdc 2x. DC 29, slip st into 30th loop. Chain 5.
4. hdc into third loop from hook. hdc 2x. dc 10, dr 1, dc 10, dr 1, dc 7, sls and chain 5.
5. Work hdc into third loop from hook, hdc 1, dc 4, dr 1, dc 3, dr 1, dc 7, dr 1, dc 7, sls and chain 4.
6. Work hdc into third loop from hook, hdc 1, sc 5, dr 1, sc 1, hdc 1, dc 6, dr 1, dc 5, sls and chain 4.
7. Work hdc into third loop from hook, hdc 1, sc 7, hdc 1, dc 5, hdc 1, chain 9.
8. Work hdc into third loop from hook, hdc 1, in 1 (use dc), dc 3. Skip next loop and stitch into next loop, pulling yarn tight (creates a 'tuck' in the fabric). Dc 7, hdc 1, ch 12.
9. Work hdc into third loop from hook, hdc 1, dc 3, in 1, dc 4. Skip next loop and stitch into next loop, pulling yarn tight. dc 12, hdc 1, ch 3
10. Work hdc into third loop from hook, dc 12, dr 1, dc 4 hdc 1, sc 1, chain 5.
11. Work hdc into third loop from hook, dc 2, sls into second dc after chain, pulling the yarn tight (creates a little weird angle), hdc 3, dc 9, hdc 6, sc 1, ch 1.
12. Sc into second loop from hook, sc 1, hdc 2, dc 10, hdc 2, sc 2, chain 4.
13. Work sc into 2nd loop from hook, sc 1, hdc 2, sc 2, chain 4
14. Work hdc into third loop from hook, hdc 1, dc 3, hdc 1, dc 9, chain 8.
15. Work hdc into third loop from hook, dc 12, hdc 1 chain 7
16. Work hdc into third loop from hook, hdc 2, dc 12, hdc 2, sc 1, chain 4
17. Work hdc into third loop from hook, dc 3, dr 1, dc 4, dr 1, sc 1, hdc 1, sc 2, ch 5.
18. Work hdc into third loop from hook, hdc 1, dc 11, hdc 1, sc 1, chain 3.
19. Work hdc into third loop from hook, dc 2, dr 1 dc 5, dr 1, hdc 1, ch 1
20. Sc into second loop from hook, hdc 1, dc 5, hdc 1, sc 1, chain 1
21. sls 2, hdc 1, dc 1, hdc 1, sc1 ch 1.
22. sls 1, hdc 1, dc 1.
Finishing!
SC around edges till you reach the 'stem'. HDC down stem front, sc up back of stem. SC back to top of leaf.
| My three beasties surround my Mabon alter. |
A loop may be placed somewhere to hang this leaf. I just laid it somewhere harvest-y (my table alter) as a cloth.
I'm working on a headband version for Samhain. I'll be sure to add that as well when it is done.
Tag!
autumn,
beginner crochet pattern,
fall harvest,
free,
leaf,
mabon,
white oak
Wednesday, September 21, 2011
Avoiding the Gorram'ed Pre-Beading Session for Hookers too!
| For a Spiderweb Samhain thing! |
There are times when I want the fun bling of beads in crochet without the pain of pre-beading or the wallet umph of buying pre beaded yarn.
Take my little lovely friend up there.The yarn is a cheap Red Heart crochet cotton, #3.. around 2 dollars. The beads I believe were a buck fifty. Stringing all the beads, distributing them along the yarn (because anal me HATES the rat tail of beads!!) was around 3 hours work..making that a pricey ball of beaded yarn.
Granted, I was watching movies (Amistad and Pulp Fiction).. but still it was tedious and ate into actual knit/crochet time. Now, I was able to very easily take my little ball o beaded yarn and work on it elsewhere.. but if I were to be staying home with it, well, gorram it, three hours is half the time it takes to MAKE the actual damned doily-thing!
So I kept thinking that some other smart person has to have come up with a way to bead crochet like knitters do. No pre-beaded waste of time... and if they have, google has hidden them from me. Even so, I'm probably not the first to come up with it. After fiddling with beads and yarns.. this is how I got the best look.
Avoiding the Gorram'ed Pre-Beading for Hookers
Needed supplies:
- One project that needs the beads.
- Beads that will fit over said yarn. Worsted uses size 2 or ponys, sock/sport/size 10 to 3 thread stuff uses size 6 beads. I'd assume smaller thread would be ok with smaller beads... but the hook would be itty bitty! For more go read my beading for knitters, I think I made a nice table or links or something.
-One itty bitty hook.
Pictured is an US 11/12 or a 1.00mm hook to use to bead. The hook in thread (working hook) is a 1.65 mm (US 7). The thread is Red Heart Classic Crochet in size 10. Excuse the pictures I was having nasty lighting issues.
What ya need to do.
First decide where you want to set the bead. On half double and single crochet the bead tends to look best when sat as close to the lower row as possible. In double and longer (triple and so on) the bead looks best when you put it more towards the center of the stitch.
This is a half done double crochet stitch. I am placing the bead in the center of the stitch, or as close to it as I can anyways.
| A double stitch ready for center beading. |
To add a bead to the second level of a double crochet: First, work half the stitch as normal. Look at the above picture.Like that. Now move to the next picture.
| Stick bead on tiny hook and prepare to slide it onto the yarn. |
| Urpin' easy! |
| Stick that yarn/thread back on the working hook. |
The next step looks like this:
| Easy and done! |
Done!
A variation, or beading right on the lowest loop.
If you like the beads lower down, then your setup would look more like this in step one/two/three:
| See the three loops on the hook? The bead is always added to the loop you pull through. |
| A double crochet, half worked, with bead placed by lower row. |
__________________________________________________________________
Now, when you are looking at all those lovely beaded projects out there and you see the designer gently trying to chide you into believing the pre-beading is not that bad... or any of the other nasty and un-fun bits that go with pre-beading ...like cutting your yarn to add more beads, thus knotting up your work. UGH!
You can now smirk with arcane and gleeful knowledge and use that extra three hours of your life on something meaningful, useful or more fun. Like picking lint off old sweaters or watching cacti grow because you just don't have to do that crap anymore!
Sunday, August 28, 2011
The Hurricane
My car is stuck in a puddle. I'm soaked to the bone from wading home in driving rain. The wind is screaming around my building.
It's good to be home. It's where I keep my stuff; my guy and my critters.
Wherever you are, give your loved humans and furrballs a squeeze.
It's good to be home. It's where I keep my stuff; my guy and my critters.
Wherever you are, give your loved humans and furrballs a squeeze.
Monday, August 22, 2011
I Need more Fuchsia in my Life.
You read right. More fuchsia. More of that bright and annoying color that takes it's name from a rather fussy and hard to keep alive flowering plant. I used to have one. Darn thing dropped dead flowers everywhere, demanded a cool but sunny spot and threw fits if I forgot to water it regularly.
But, the flowers. Each was a little reminded that all in life is not dull, death and loss. They were so bright that I was asked from time to time if the plant was fake. I loved that little plant. I unfortunately lost it when my basement warmed up a bit too much and the little guy came out of hibernation and died from lack of light and water before I realized what had happened. Now have several years pass, and now you have today. I had forgotten my little plant of happy, fussy flowers.
Then I went thrifting. I was kind of looking for a new summer dress or two; it's been hot here (very hot!!) and when It's hot I favor loose, flowy cotton/silk/good rayon dresses simply because a single item of clothing is just more comfy and more cool.
And this dress is all of that. Bright, cheerful, and cool and comfy. The colors made me very happy. But, can't wear it outside of the warmest part of the year.
So I made this:
There really is no pattern to speak of, if you wish a bright bag of your own. It's just half double crocheting into a chain to create a little pocket (like my simple nook sack) and then working your way up. And I really didn't take any notes... it is that easy.
The recipe for A Fuchsia Bright Bag.
Three basic stitches. (American)
Double Crochet
Half-Double Crochet
3 stitch Picot Crochet Edge
Supplies
Plymoth Yarn Sockotta in plum, about 100 yards.
The hook was an E.
One bead with a big enough hole for a few strands of the yarn.
I did an even number of stitches around, I believe it was 24.
I did do one row of crochet into back loop for two stitches, crochet into front loop for two stitches, work two rows plain hdc. Do a second row of back/front fun. It gives a bit of texture to a very plain stitched bag.
The cord row is worked as: double crochet one, next stitch worked as a chain one, repeat.
The cord is real crochet I-cord. This is the easiest way to make the stuff.I used 3 stitch, as in video.
Work a row or two more of hdc. Get to a corner of the bag (I prefer the slightly lower edge) and begin to work 3 st picot.
Run your icord through the holes in such a way as the tails end up both on the outside.
I rammed the ends of the cord into a camel bone bead and knotted it.
Fill with dice or other little fun thingies.
I decided I needed still more fuchsia fun in my life... so I picked up some fuchsia (and yellow for the base) nail polish. That may be too much fuchsia for sane people though. It may be too much for me... but I won't decide that till February when everything is dead and grey and covered in ice.
But, the flowers. Each was a little reminded that all in life is not dull, death and loss. They were so bright that I was asked from time to time if the plant was fake. I loved that little plant. I unfortunately lost it when my basement warmed up a bit too much and the little guy came out of hibernation and died from lack of light and water before I realized what had happened. Now have several years pass, and now you have today. I had forgotten my little plant of happy, fussy flowers.
Then I went thrifting. I was kind of looking for a new summer dress or two; it's been hot here (very hot!!) and when It's hot I favor loose, flowy cotton/silk/good rayon dresses simply because a single item of clothing is just more comfy and more cool.
| Dress of color! |
And this dress is all of that. Bright, cheerful, and cool and comfy. The colors made me very happy. But, can't wear it outside of the warmest part of the year.
So I made this:
| Wee little dice bag of Fuchsia!! |
There really is no pattern to speak of, if you wish a bright bag of your own. It's just half double crocheting into a chain to create a little pocket (like my simple nook sack) and then working your way up. And I really didn't take any notes... it is that easy.
The recipe for A Fuchsia Bright Bag.
Three basic stitches. (American)
Double Crochet
Half-Double Crochet
3 stitch Picot Crochet Edge
Supplies
Plymoth Yarn Sockotta in plum, about 100 yards.
The hook was an E.
One bead with a big enough hole for a few strands of the yarn.
I did an even number of stitches around, I believe it was 24.
I did do one row of crochet into back loop for two stitches, crochet into front loop for two stitches, work two rows plain hdc. Do a second row of back/front fun. It gives a bit of texture to a very plain stitched bag.
The cord row is worked as: double crochet one, next stitch worked as a chain one, repeat.
The cord is real crochet I-cord. This is the easiest way to make the stuff.I used 3 stitch, as in video.
Work a row or two more of hdc. Get to a corner of the bag (I prefer the slightly lower edge) and begin to work 3 st picot.
Run your icord through the holes in such a way as the tails end up both on the outside.
I rammed the ends of the cord into a camel bone bead and knotted it.
Fill with dice or other little fun thingies.
| You can see the detail the front/back post rows add to the little bag. In a quieter yarn they'd be nice worked all through the body. |
Wednesday, August 10, 2011
Henna!
I'm a new convert. I admit it. I love the goop. It is only the second day mind you... but OMG, my hair.
- It is baby-soft.
- I'm still curly.
- The reds are so pretty.
- It just feels and looks amazing!
- It is baby-soft.
- I'm still curly.
- The reds are so pretty.
- It just feels and looks amazing!
Sunday, July 31, 2011
This Summer's Heat..
..is cooking me. First it was over 90 for a week straight outside.. my apartment averaged 96 to 98. Now, the humidity is hovering around 100%. I'm guessing the earth has decided that simply baking us to death is not good enough. We must be steamed to release the proper flavour.
Anyways, I have barely been able to stand touching any crafty thing almost all month. No drawing, no painting, very little sewing and almost no knitting or crocheting. I'll start and then the heat just wears me out or the idea of touching heat trapping yarn or cloth or smudgy messy things that will then require me to clean atop of making the artz.. just no. Dog and I have spent so much time outside swimming and hiking slowly around that this whitest of white girls has a tan. In my search to keep my cats from cooking in their fur they have grown used to cool water dunks. Funny how weird things like that can happen.
So, enjoy this lovely sunset. Two angles, same sunset, 15 minutes apart.
Anyways, I have barely been able to stand touching any crafty thing almost all month. No drawing, no painting, very little sewing and almost no knitting or crocheting. I'll start and then the heat just wears me out or the idea of touching heat trapping yarn or cloth or smudgy messy things that will then require me to clean atop of making the artz.. just no. Dog and I have spent so much time outside swimming and hiking slowly around that this whitest of white girls has a tan. In my search to keep my cats from cooking in their fur they have grown used to cool water dunks. Funny how weird things like that can happen.
So, enjoy this lovely sunset. Two angles, same sunset, 15 minutes apart.
Wednesday, June 29, 2011
I Made Hair-Toys! And did girly things with hair..
Those few of you who may read this who know me in RL will be surprised at this. I've got hair most of the way down my back these days. I don't plan on cutting it any time soon either. All this really means is I need fun ways to keep it off my neck in this heat that aren't ponytails. I've been braiding my hair a lot...and playing with buns.
I have very thick hair. While not 100% accurate, my ponytail is nearing 6 inches (this is not accurate to the nnth degree because I used string to measure this) in circumference. It is also curly and on the finer end of textures. All of these things mean it is a bitch to do anything with. It's thick, so lots of hairstyles need it to be longer to look right. Curly means brushes just rip it out. It not being coarser means it will slip out of do's faster.
But, I can do hairstick stuffs.
| Freshly Created Hair Sticks!! |
Tuesday, June 28, 2011
My Applogees, People.
I did not realize I had so many damned ads on this thing. I *thought* I had one small one on the side and one way at the bottom buried below everything. Both are supposed to be text only and blended in to not be obnoxious. I turned off a few security things for a minute and all of a sudden I had all of these new little boxes popping up on the blog control panel. Opened a preview and... yeah. I'm sorry.
I fixed it. I was adding a pattern link box and updating other stuff to make this thing better.. and those ads were just too much. I did add a music widget from Amazon but my quick check tells me it won't start blaring at you all of a sudden. And, I like music. I like clicking on music widgets. That one can stay.
Awesome Thing found in a Thift Store! And SPARKLIES!
I'm not sure what exactly it is but it is indeed awesome. It is a Thing from the Thrift Store!
This is what happened.
After the Great Burn of Last Month, I am really keen on not getting crispy again. I now have fresh new unholy strength sunblock (safe even from Hell's flames!), an actual tan..I'm really not sure how that happened.... and a desire to somehow protect my head skin and hair too. Did some reading. Turns out that one of the best things one can use to protect both your hair and your scalp from a burn is dark smooth silk. So, I need at least one silk scarf. But, Jesus on a pogo stick, those things are so not cheap. I mean, 40 dollars for a chunk of fabric with hems on? Argh! No thanks.
So on to the thrift store I go.. in search of silk shirts.. After a search I find what I seek. Two silk shirts of silky silk. Mmmmmmm. One is blue and one is a faded jade green. I will dye them with pretty dyes in tye dye or batik and fashion as I need. Haven't decided yet the final shape. But those are not what this post is about. They are only what drove me to the thrift store. I may post them later after I've sniped and dyed and made them into scarves.
This is what it is about!
I really wish I knew what it was supposed to be used for. Or, if it is like the blue and white Willow Pattern plates with meaning and stories behind it. Or maybe it's just a simple design. It is a lovely Indian lady in a Gagra choli or shalwar kameez (my google fu is unclear here) with a 3 leaved pot atop her head walking through a field. The pot is steaming or on fire..or??
On a side note, googling her dress gave me serious outfit envy. I really need to stitch up a white fat girl friendly version of one of these. First, must finish what I have already started.That is, I must finish my skirt retcon (adding batik fabric to a black mini) and finishing the top I have all charted out from craftster (the backless black one, but done reversible in black paisley and blue pseudo-batik and with a bit more coverage/ties instead of single fit) and do a bit of drawing.
Any way it is, it will look lovely on the brickwork wall in my apartment. I will probably shine it up a bit with brasso first.
And... I must share these!
Nail polish this summer is just full of the sparkles. Last week I picked up a deep sparkly green and a gold glitter. I like them together, with the green nice and dark and the golden glitter lightly brushed over the tips. It's very summer goddess. On a whim I went by the polishes on my way to craft supplies and had to get these:
That is a chrome, five colors of sparkle in one polish, purple glitter and silver glitter. The shiny, I'm blinded by the shiny and the sparklie. I need more hands so that I can wear all these faster.
Now, time to do my nails!
This is what happened.
After the Great Burn of Last Month, I am really keen on not getting crispy again. I now have fresh new unholy strength sunblock (safe even from Hell's flames!), an actual tan..I'm really not sure how that happened.... and a desire to somehow protect my head skin and hair too. Did some reading. Turns out that one of the best things one can use to protect both your hair and your scalp from a burn is dark smooth silk. So, I need at least one silk scarf. But, Jesus on a pogo stick, those things are so not cheap. I mean, 40 dollars for a chunk of fabric with hems on? Argh! No thanks.
So on to the thrift store I go.. in search of silk shirts.. After a search I find what I seek. Two silk shirts of silky silk. Mmmmmmm. One is blue and one is a faded jade green. I will dye them with pretty dyes in tye dye or batik and fashion as I need. Haven't decided yet the final shape. But those are not what this post is about. They are only what drove me to the thrift store. I may post them later after I've sniped and dyed and made them into scarves.
This is what it is about!
| Awesome thing is AWESOME! |
I really wish I knew what it was supposed to be used for. Or, if it is like the blue and white Willow Pattern plates with meaning and stories behind it. Or maybe it's just a simple design. It is a lovely Indian lady in a Gagra choli or shalwar kameez (my google fu is unclear here) with a 3 leaved pot atop her head walking through a field. The pot is steaming or on fire..or??
On a side note, googling her dress gave me serious outfit envy. I really need to stitch up a white fat girl friendly version of one of these. First, must finish what I have already started.That is, I must finish my skirt retcon (adding batik fabric to a black mini) and finishing the top I have all charted out from craftster (the backless black one, but done reversible in black paisley and blue pseudo-batik and with a bit more coverage/ties instead of single fit) and do a bit of drawing.
Any way it is, it will look lovely on the brickwork wall in my apartment. I will probably shine it up a bit with brasso first.
And... I must share these!
Nail polish this summer is just full of the sparkles. Last week I picked up a deep sparkly green and a gold glitter. I like them together, with the green nice and dark and the golden glitter lightly brushed over the tips. It's very summer goddess. On a whim I went by the polishes on my way to craft supplies and had to get these:
| Shiny. Oh, so very shiny. |
Now, time to do my nails!
Tuesday, June 21, 2011
Random Foodie Post: Seared Tomatoes!!!
I made something awesome today for dinner. I, like many veggie aficionados,often buy a few too many veggies that can be consumed willingly in say, the week before they rot. This time it was tomatoes. The store had a sale on vine ripe red tomatoes... and even though they are no where as good as farmer's market 'matoes I bought two pounds of them thinking something vague about giant tossed salads and Greek Pizza/ white pizza (For those who DON'T KNOW -sad for you!- a Greek pizza uses a white sauce or olive oil with herbs and feta cheese with sliced tomatoes... and white pizza is just Greek pizza without the feta. Yummy!).
And today, I opened the fridge to figure out what to make for dinner I saw the last of these poor things. Still OK but with that slight skin dimple of impending doom. I had to use them but I was fresh out of dough, and another salad would turn me into a bunny.
Now, all praises to the mighty internet gods because it came to my rescue. And that of my poor wilty tomatoes.
Meet Skillet Seared Tomatoes. Ah.. the answer to my prayers.
But I did not have all the things. Some of these things are a bit outside the family's shopping comfort level because they go bad before we can use them. So, I subbed. And, our salt has the iodine in. Everything else was the same.. their directions were followed to a T.
So..these are thier ingredients:
We had them with barbecued beef sandwiches. Very fresh and tasty. Were I to make them again I'd add more garlic (it cooked up a bit too sweet in the oil)... and a bit more sugar since these were not heirloom style tomatoes. The sharpness of the cheddar played very nicely with the sweet garlic and zing of the tomato though. I'd also probably leave them on high heat a bit longer to brown them a bit more.
And today, I opened the fridge to figure out what to make for dinner I saw the last of these poor things. Still OK but with that slight skin dimple of impending doom. I had to use them but I was fresh out of dough, and another salad would turn me into a bunny.
Now, all praises to the mighty internet gods because it came to my rescue. And that of my poor wilty tomatoes.
Meet Skillet Seared Tomatoes. Ah.. the answer to my prayers.
But I did not have all the things. Some of these things are a bit outside the family's shopping comfort level because they go bad before we can use them. So, I subbed. And, our salt has the iodine in. Everything else was the same.. their directions were followed to a T.
So..these are thier ingredients:
- 2 tablespoons extra-virgin olive oil
- 4 large ripe plum tomatoes, halved lengthwise
- 2 tablespoons finely chopped flat-leaf parsley
- 1 medium clove garlic
- 1/2 teaspoon sugar
- 1/2 teaspoon kosher salt
- Freshly ground pepper, to taste
- 3/4 cup shredded Gruyere, Comte, fontina or mozzarella cheese
- 2 tablespoons finely chopped flat-leaf parsley
- 1 medium clove garlic, minced
- 1/2 teaspoon sugar, (optional)
- 1/2 teaspoon kosher salt
- 2 tablespoons extra-virgin olive oil
- 4 large ripe tomatoes, halved lengthwise
- teaspoonish of oregano
- 2 teaspoons of garlic and parsley seasoning (it is dried garlic and parsley, NO SALT!!)
- 1/2 teaspoon sugar
- 1/2 teaspoon salt
- regular pepper, to taste.
- 3/4 cup shredded sharp cheddar
| Pan seared tomatoes. So tasty!! |
Tag!
dinner,
heathy meal,
pan fry,
pan sear,
tomato,
vegetarian option,
waste not,
yummy food
Monday, June 13, 2011
My Nook Gets a Case!
I has an awesome BF!
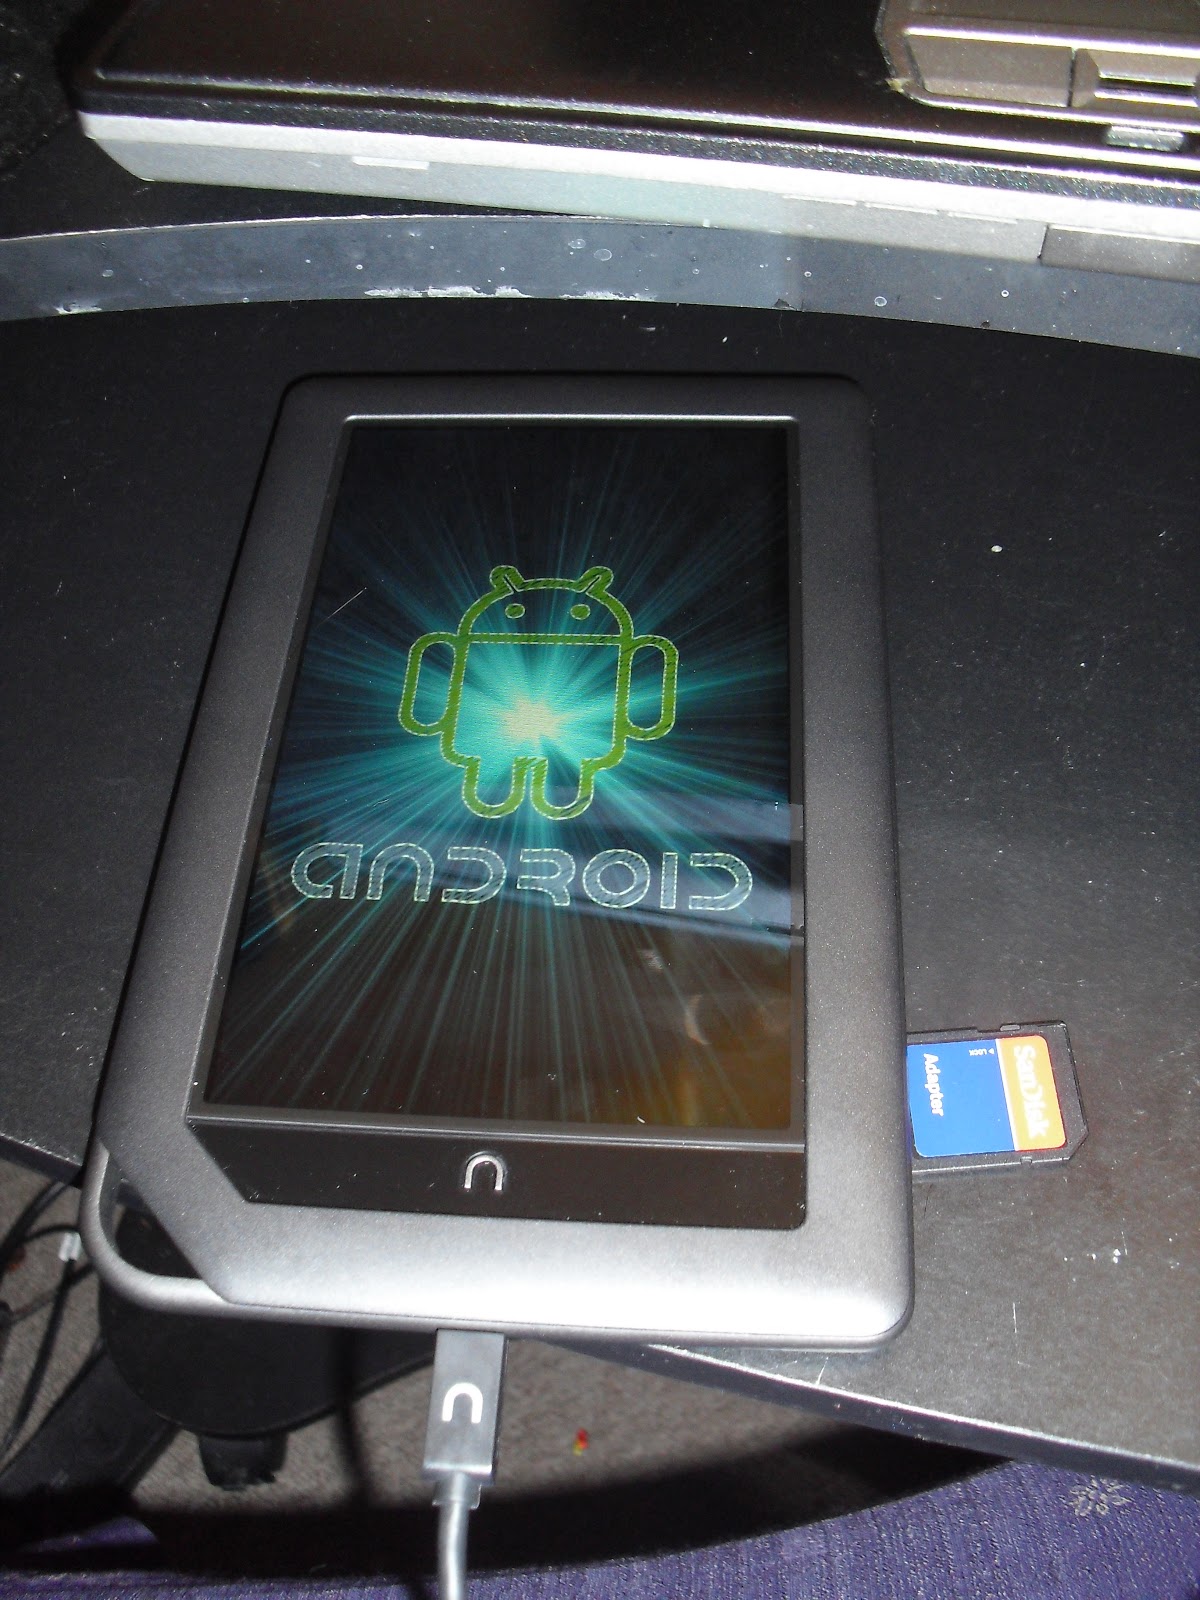
He got me a Nook for my birthday. I hacked it into a tablet... then made it a little Nook Sack.
(And then started to write this post.. got horribly distracted.. and then felt guilty. And, then put it off because I felt guilty.And put it off some more. But... it was eating at my soul, this post. It was so close to being finished, so close to being done. All I had to do was go back and edit a bit.. and then hit Publish.
Argh. I just couldn't deal with the nagging feeling of guilt that comes from a completed post unpublished. So here you have it, a crocheted NookSack, the really easy easy way. And, since this item has been in my rather hard-wearing use since early May I can now say that the thing holds up great. It hasn't warped out of shape, the thick stitches really pad the piece and my Nook looks great. I do plan for a hard case if we ever did any serious traveling.. but this crocheted thing is great for pursing the Nook. Also, as my man so delicately put it, "It looks like a little girls purse that her mommy made for her so no one will be tempted to steal it." Ain't he sweet.)
The Crocheted NookSack.
I used crochet to make a squishy thicker fabric...and because it's faster for me. All it is is a worked in the round single piece with a fastened down (at each end) flap in purple as a lid.
Supplies:
5.00 mm hook
4.25 mm hook
yarn needle
1 skein Pisgah Yarn & Dyeing Co., Inc Peaches & Creme Ombres. I used winterberry.
At least 40 yards of a pleasantly complementary color. I used purple.
This thing is SUPER EASY! All sts are American half double crochet.
First, using the 5mm hook, chain 27. (Note: This will make a fairly snug pocket. As it is cotton it will stretch as you use it.) Chain two and turn and work back to end of chain. Now you will work the same chain sts to create a pocket. First, work a second half double st into the last chain st. Then, work a third half double into that same st. You will have three total in that last st.
Now work back along that chain, putting a half double in each chain again. (This is why we used a bigger needle for the base chain... it needed to be a bit loose!) It will look like this:
Work another half double st into the end chain st (again) to have three total.. again. Now, work a single chain and begin the next round, spiraling up the piece of work. I worked around 15 rows till Nook top is reached. Chain once and attach to row after nook top is reached.
Work back and forth along slightly higher pocket side in second color. I did 6 rows. Using yarn needle very carefully stitch each flap edge to the pocket's edge.
I was going to stitch an Irish rose and leaves onto the front of the cover... but then I started to worry about the extra fabric pressing into the screen when it was in my bag. So no rose.I already had the rose made so no I'm working on giving it a new home.
And there you have it. World's easiest crocheted NookSack.
He got me a Nook for my birthday. I hacked it into a tablet... then made it a little Nook Sack.
(And then started to write this post.. got horribly distracted.. and then felt guilty. And, then put it off because I felt guilty.And put it off some more. But... it was eating at my soul, this post. It was so close to being finished, so close to being done. All I had to do was go back and edit a bit.. and then hit Publish.
Argh. I just couldn't deal with the nagging feeling of guilt that comes from a completed post unpublished. So here you have it, a crocheted NookSack, the really easy easy way. And, since this item has been in my rather hard-wearing use since early May I can now say that the thing holds up great. It hasn't warped out of shape, the thick stitches really pad the piece and my Nook looks great. I do plan for a hard case if we ever did any serious traveling.. but this crocheted thing is great for pursing the Nook. Also, as my man so delicately put it, "It looks like a little girls purse that her mommy made for her so no one will be tempted to steal it." Ain't he sweet.)
The Crocheted NookSack.
| My haxxor skills. FEAR THEM! All kidding aside, this was easy as installing a program on a Windows device. (Now I have CM7 on it but whatever.) |
| The way the colors lined up pleased me. |
5.00 mm hook
4.25 mm hook
yarn needle
1 skein Pisgah Yarn & Dyeing Co., Inc Peaches & Creme Ombres. I used winterberry.
At least 40 yards of a pleasantly complementary color. I used purple.
This thing is SUPER EASY! All sts are American half double crochet.
First, using the 5mm hook, chain 27. (Note: This will make a fairly snug pocket. As it is cotton it will stretch as you use it.) Chain two and turn and work back to end of chain. Now you will work the same chain sts to create a pocket. First, work a second half double st into the last chain st. Then, work a third half double into that same st. You will have three total in that last st.
Now work back along that chain, putting a half double in each chain again. (This is why we used a bigger needle for the base chain... it needed to be a bit loose!) It will look like this:
| ..kinda like a little boat.. |
Work back and forth along slightly higher pocket side in second color. I did 6 rows. Using yarn needle very carefully stitch each flap edge to the pocket's edge.
I was going to stitch an Irish rose and leaves onto the front of the cover... but then I started to worry about the extra fabric pressing into the screen when it was in my bag. So no rose.I already had the rose made so no I'm working on giving it a new home.
And there you have it. World's easiest crocheted NookSack.
Tag!
crochet,
ereader,
free crochet,
free pattern,
Irish Rose,
nook,
nook protector
Thursday, June 2, 2011
I Went Hiking! A Pictorial Post.
Subscribe to:
Posts (Atom)


