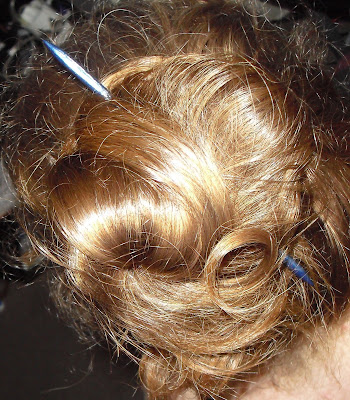
Those few of you who may read this who know me in RL will be surprised at this. I've got hair most of the way down my back these days. I don't plan on cutting it any time soon either. All this really means is I need fun ways to keep it off my neck in this heat that aren't ponytails. I've been braiding my hair a lot...and playing with buns.
I have very thick hair. While not 100% accurate, my ponytail is nearing 6 inches (this is not accurate to the nnth degree because I used string to measure this) in circumference. It is also curly and on the finer end of textures. All of these things mean it is a bitch to do anything with. It's thick, so lots of hairstyles need it to be longer to look right. Curly means brushes just rip it out. It not being coarser means it will slip out of do's faster.
But, I can do hairstick stuffs.
 |
| Freshly Created Hair Sticks!! |
 |
| The basic supplies! A tape measure, fun nail polish, new nail file, pencil sharpener and a cup of dry rice or a clamp. |
(For all of them)
1 clear sealant (I used colorstay Revlon 2 Always On, it is nice and rubbery. And has an AWESOME grippy/no chip feel!)
Black set:
Maybeline Express Finish "Black Out" (It's thick, I'd use a thinner cheaper polish next time)
1 Purple glitter (I had O.P.I. something)
Green DPN Set
Wet n Wild SaGreena the Teenage Witch
WnW The Gold that the Beautiful
Purple and Blue Long DPN style singles
WnW Sapphire Blue (Thick, get a runnier blue)
The one in the pic! (Sally Hansen Orchid I think.. it's walked off..)
Sally Hanson Diamonds
Red-Gold set
Sally Hansen Amber Ruby
I have a sneaky suspicion that enamel paints and wood sealant will work too if ya got them!
Step 1. Prep Work!
 |
| Cut and file to right length. The long DPNs are 6 inches, the short DPNs are 3 and 3/4 tip to tip. Black set is 6 and a half and red/gold set is 4 and a half. |
 |
| Stick stick in rice, paint the part sticking out. |
Coat thick. Start at the tip and work down. Leave stick to dry for at least a few hours...maybe overnight... might need a fan. These dried slow for me! After the stick is fully dry, pull out, flip around and paint the other side. Might need a few coats to fully coat the stick.
 |
| Half done... |
Now. Glitter! (AKA Step 3)
 |
| Shiny..... |
Step 3. Model!
 |
| Single Stick? Yup! |
My hair is a bit thicker and shorter then hers. I did have to twist the hairtail a bit and tuck the end under before fiddling with the stick. It stayed great.
There are lots more ways to do hairsticks.
This lady shows you 3 random ways to do it. And there are a million other ways too. Hair sticks are very versatile!
If you are wondering what is wrong with just a ponytail all the time I'm happy to tell you. Hair that is tied in the same place with elastic all the time shows wear at that spot. If you intend to grow long hair.. that is an issue because your hair will break and fray at the elastic point. Hair sticks don't fray the hair shaft like elastic does. And you can put glitter on them. Win-Win.
..in all non-glitter seriousness.. I do have the stuff around to make a few copper wrapped wood and stone with chiseled details... but I wanted to do these easy ones first. And, I wanted glitter.

No comments:
Post a Comment